The Best Productivity Tips and Tools for High Volume Photo Editing
Now that spring is here, your calendar is most likely filling up with new projects. Photoshoots themselves are a blast, but what about the endless hours you’ll need to spend editing afterwards? If this very thought just made you sigh – you’re in the right place. Here are some of the best methods for a more productive editing process in 2021.
1. Outsource your photo editing
If you already know that editing is not your cup of tea, consider outsourcing. Today, there are a lot of services on the market that can edit photos for you. Some will offer their own editing styles, but most provide the option of developing your own “profile”, based on editing preferences.
Pros
This method will, without a doubt, free up a lot of your time. Once the outsourced service fully understands your style, you can forget about having to edit again.
Cons
You should consider three main factors: cost, training, and consistency. Pricing depends on the number of photos you send for editing and the turnaround time. The person assisting you will also need time to adapt to your editing style, and might not always be available and/or consistent. If your budget and deadlines are tight, then this method might be problematic, especially if it requires making corrections.
Key tools: ShootDotEdit and Image Salon

2. Use presets
For the past few years, Presets (or filters) have been some of the most powerful tools in photography. They gained massive popularity thanks to apps such as Instagram and TikTok.
Pros
Presets allow you to apply multiple predefined parameters to every photo in your collection. Advanced presets provide several options depending on the lighting conditions of your photoshoot so you could save time on tweaking presets.
Cons
Most presets will need further adjustments because their static parameters won’t fit all kinds of lighting conditions. This solution isn’t the most efficient option, but it’s definitely a good starting point if you’re willing to spend time on it. You should also consider the fact that using commercial presets limits your creative abilities and produces more generic edits.
Key tools: VSCO, Dirty Boots and Messy Hair, 123presets, Mastin labs, On1 Photo RAW, and Visual Flow

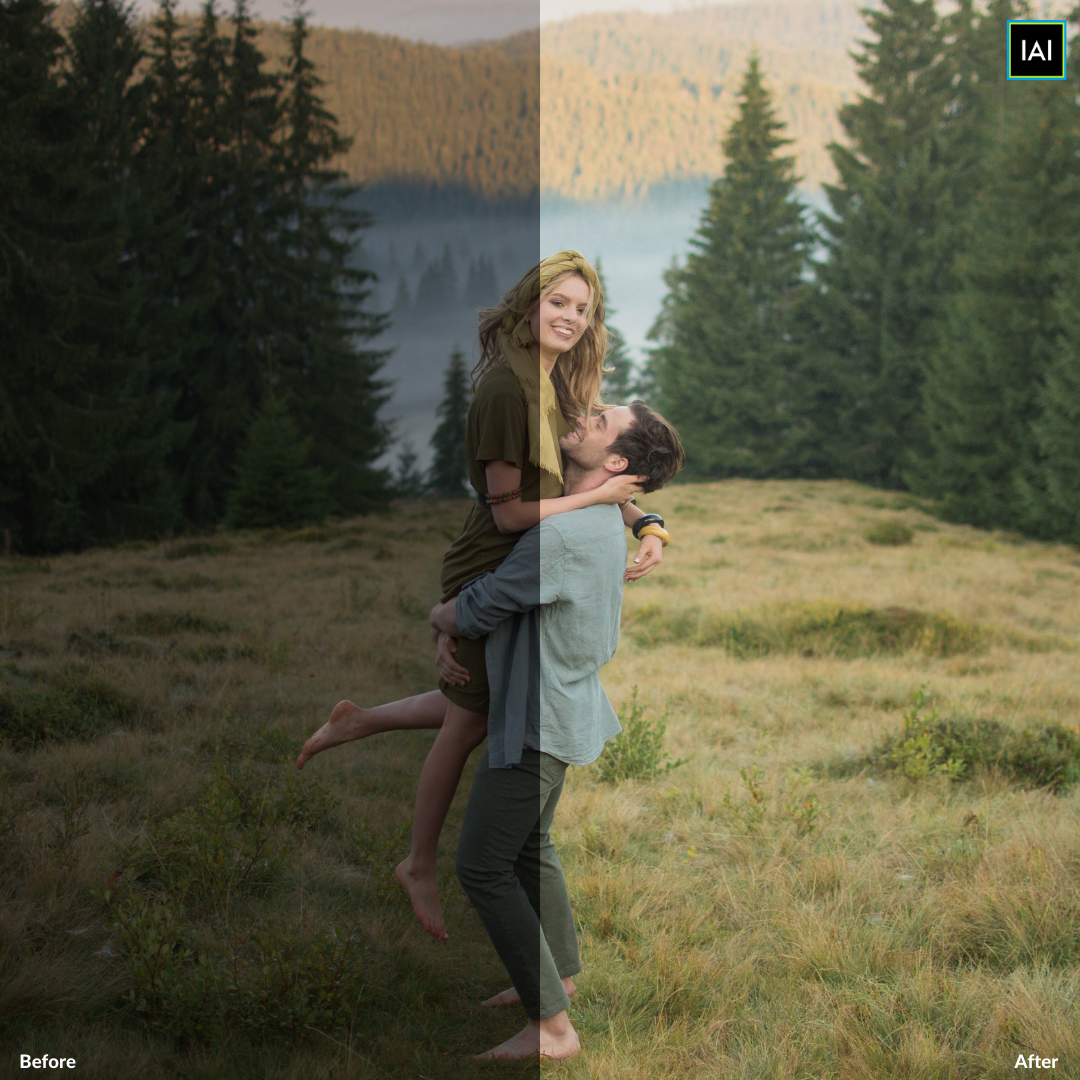
3. Turn to personalized AI editing
Artificial Intelligence (AI) is the next big thing in photo editing. It’s all about your voice, and a unique edit to fit every image. This solution is based on machine learning, which means that the more information and edits your feed, the more accurate the system becomes.
Pros
AI Editing is as quick as it gets. It’s hassle free, optimizable to any personal editing style, and adjustable to every photo in your catalogs. It’s also consistent with every image, and significantly cheaper than outsourcing your edits. At the end of the day, it’s an efficient, time-saving option.
Cons
Creating a personalized AI profile might not be the most practical option for beginners. Experienced photographers, on the other hand, will have thousands of examples to base their precise AI style on.
Key tool: ImagenAI is currently leading the game with their personalized AI Lightroom assistant. They pride themselves on providing an edit in one second (professionals can be four times as productive using their services), and for having full integration with Lightroom.
4. Try auto-enhancement tools
If you decide to do it yourself, but don’t want to manually interfere with the original frame, then auto enhancement tools are the way to go. These tools will edit one (or more) parameter in a single click: usually light, saturation, sharpness, and contrast.
Pros
These tools are very straightforward and user-friendly. If your photos are technically well-shot, and can be perfected using auto-enhancement tools only, it’s a quick way to enhance your RAW photos.
Cons
Most of these tools will require additional adjustments, so they’re not the most time-saving option. They also don’t reflect your personal editing style. Many professional photographers might start with auto-enhancement tools, but eventually spend time tweaking their results.
Key tools: Topazlabs, Skylum Luminar, and Gimp

5. Simplify your editing process
The key to productive editing is using everyday shortcuts, and making the editing process more intuitive with controllers.
Controllers
Assign faders/knobs or a special keyboard to your preferred software. By doing so, you can command multiple actions and optimize how you navigate through the post-processing stage.
Shortcuts
Depending on your software, there are multiple keyboard shortcuts that can speed up the editing process; Whether it’s to speed up file imports, view before-and-after edits, or straighten frames more accurately. These tricks can be extremely useful and time-saving.
Pros
Both shortcuts and controllers allow you to work faster, and have a better perspective on the parameters you’re changing in real-time.
Cons
Equipping yourself with a controller is costly, and it might not be an option that’s available to everyone. If you’re a beginner, it’ll take time before you figure things out. But practice makes perfect, and you can find numerous helpful tutorials online.
Key tools: Monogram, Loupedeck, and Pfixer

Wrapping it up
Whether you’re a newbie in the field, or a seasoned professional, it’s important to understand that your time has value. For this reason, make sure you’re not spending it recklessly. Follow smart solutions to boost productivity and reduce your editing time. If you ask us, it looks like AI tools will be taking the market by storm, so consider getting acquainted with them right about now.