Capturing Motion in Sequence Photography: A Guide for Beginners
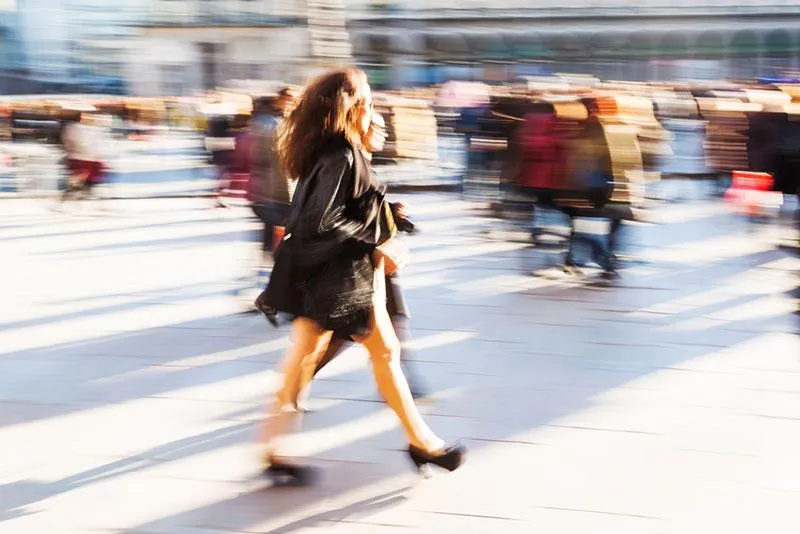
Photographers have long struggled to add a sense of motion to static pictures, employing a variety of methods and approaches. One technique provides a completely new perspective on the matter: sequence photography. It can help you create a convincing storyline and add a sense of realism to your pictures. What’s more, it can push you to experiment, expand your creativity, and add new elements to your personal style.
Why don’t you give it a try? Learn to take sequence photos to deliver impactful results. Here is a step-by-step guide on how to incorporate this technique into your projects!

What is sequence photography?
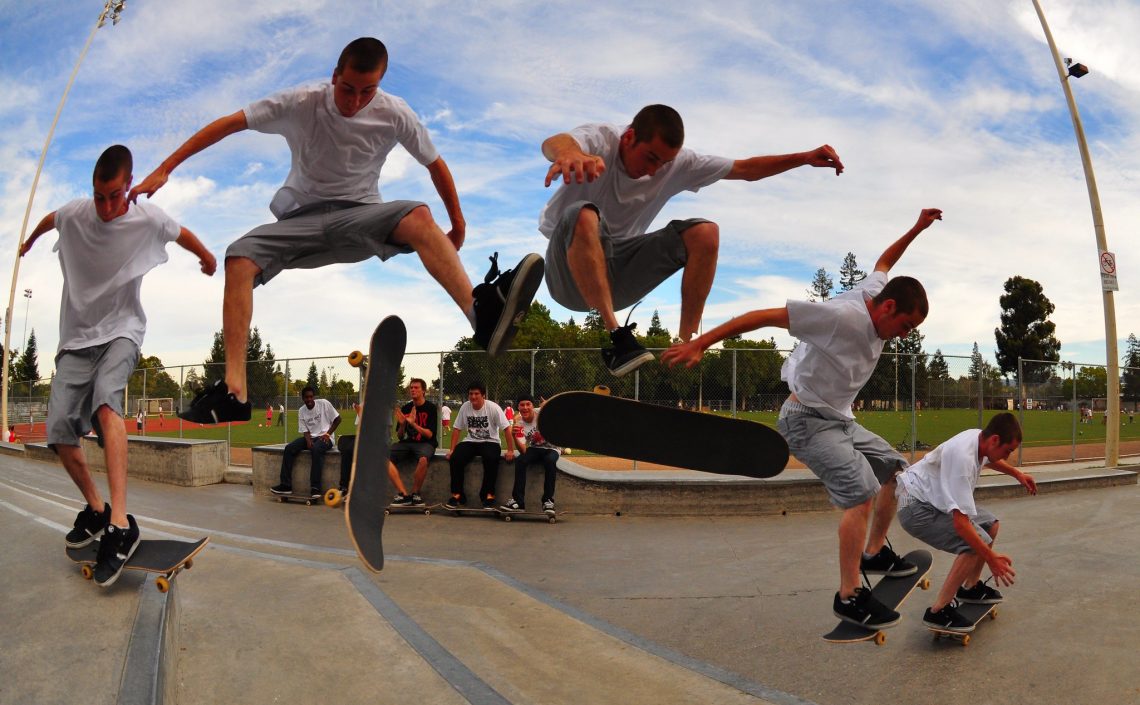
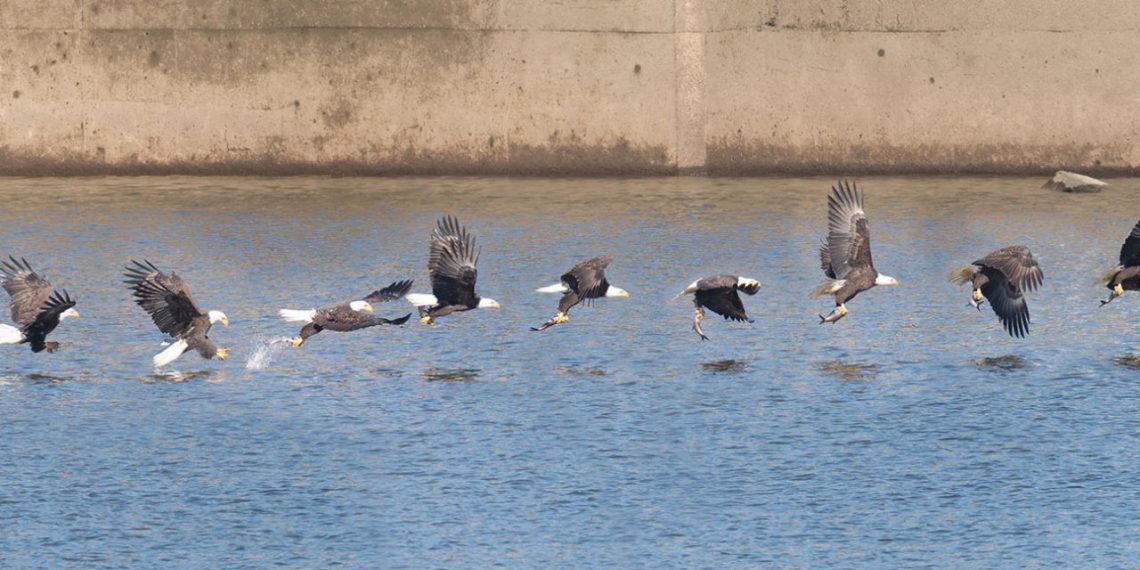
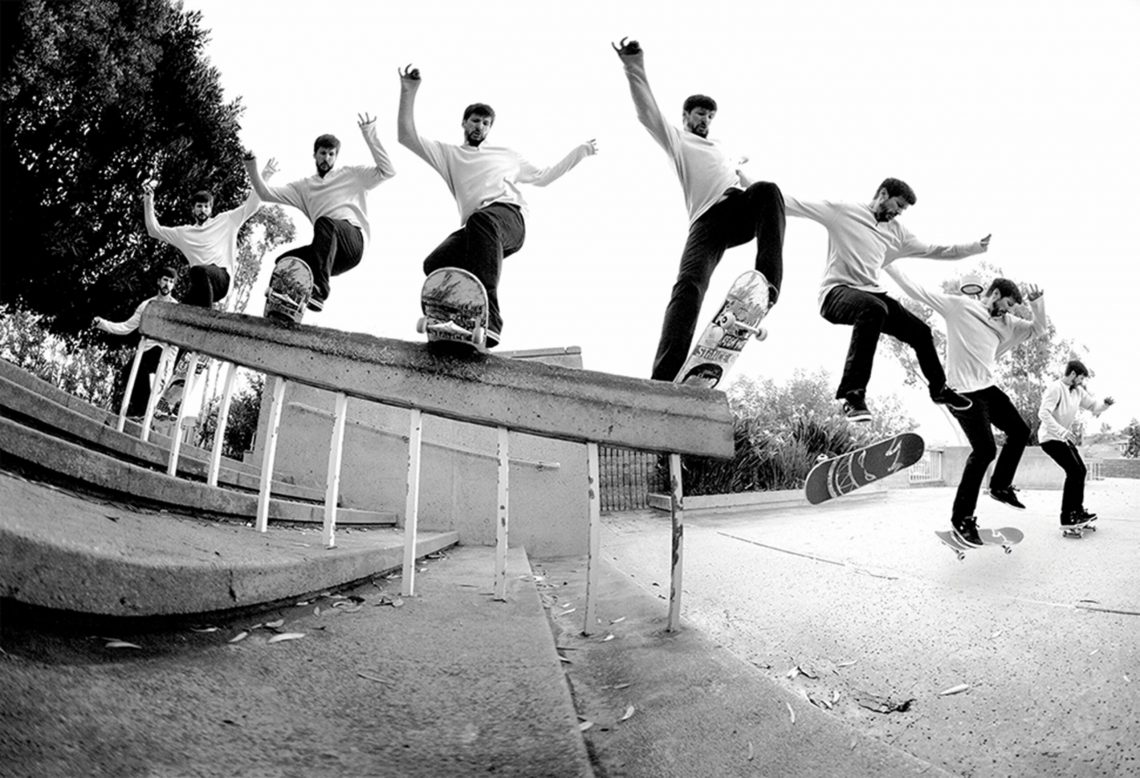
Sequence photography is one of the motion-capturing techniques. It refers to the process of capturing several rapid-fire shots of a moving subject and combining them into a single photograph. This way, a sequence shot can display the subject in multiple positions throughout the frame. Unlike video, the subject’s movements are frozen, so every detail can be seen perfectly. Of course, some editing software magic is involved — a sequence shot requires a photographer to layer several frames together during post-production. Yet, no matter how good your digital skills are, the beauty of the final image depends on the quality of the photos you take.
Sequence photography is quite often used in shooting action sports to capture an athlete performing a stunt or extreme trick that would be difficult to depict and understand in a single-frame photo. Although this technique is popular with sports photographers, it can also be used in any other genre as a great way of conveying motion in a static image. A merged photo sequence can dramatically change the perception of your photo and the general effect it has on viewers. Besides, it’s always fun to practice a new skill!
5 top sequence photography tips
1. Sequence visualization.
First things first: you must identify the shot you’re going to take. Select a moving subject and decide on a movement it is going to make. Then, take a walk around the place where the action is going to happen, just as if you were taking a normal photo. You need to find a perfect angle that will give you a clear view of the different frames without making a picture too cluttered.
2. Scene-setting photo.
You’ll need room for a subject to enter and leave the frame, so you should take a wider shot than you usually do. This big picture that shows your audience what’s going on is called a scene-setting photo. The trick is to fit as much story into your scene as possible to capture the entire movement of the subject.
3. Necessary gear.
You don’t need much equipment to take a sequence photo: A wide-angle lens, a tripod, and photo editing software are essential for a quality shot. A wide-angle lens will come in handy to reduce the risk of frames overlapping. It expands the space between each movement in the sequence and makes items look farther away. A tripod is necessary to stabilize your camera to ensure that you capture the same framing, composition, and exposure. Finally, editing software is needed to combine all the frames in a single image.
4. Camera settings.
When making a sequence photo, it’s best to shoot in manual mode. This way, you can ensure consistent exposure across all of your shots. It’s crucial to keep your shutter speed high to freeze your subject in action clearly and avoid motion blur. It can vary from 1/500 to 1/800 depending on the speed of your subject’s movement — the key is to capture enough frames to layer them easily and produce the sequence effect.
5. Merging the sequence
Choose several shots and upload them on post-editing software. Then open the layers and rearrange them so they overlap in the order you want, with first image in back and the last image in front. Make your first layer visible and edit out any unnecessary elements: this will form the background for all the motion segments. Next, open the second layer, make it visible, and use the lasso tool to select your subject. Copy the selected area, paste it as a new layer, and delete the second layer. Follow the same process for the remaining frames, then flatten the layers together and save the result as a single picture. If you like, you can experiment with different opacities to create a fade effect.
To wrap up
Sequence photography allows you to capture movement with beauty and detail that is much harder to convey in a single shot. There are countless ways to incorporate sequence photography into your portfolio — it’s just a question of knowing how. You can start by practicing with only a wide-angle lens, a tripod, and editing software. It may take some trial and error, but the results are definitely worth it!
Other articles you may find interesting
Establishing a Point of View: Essential Principles and Examples
Camera Shots Explained: The Ultimate Guide to 8 Most Common Types of Shots
Understanding Common Aspect Ratios for Images and Video