Photoshop Tutorial: How to Convert Images to Black and White
Many photographers see the charm in black and white photography and if you’re at all interested in the art, here’s a good place to start. Converting your images to black and white is easier than it seems.
Sometimes desaturating images in Photoshop makes them bleak. Here is one of the many ways to convert an image to black and white and tweak it just enough to produce a photograph with great contrast and improved details.
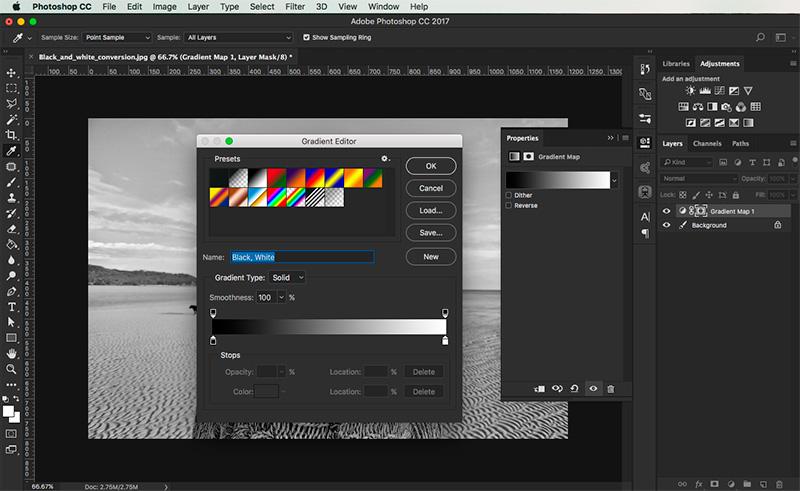
Step 1: Open your image in Photoshop and add a gradient map in adjustments.

Step 2: Go to ‘Image’, ‘Adjustments’ and ‘Curves’. Adjusting 2 points along the curves will alter the gradient of the image.

Step 3: Go to ‘Image’, ‘Apply image’.

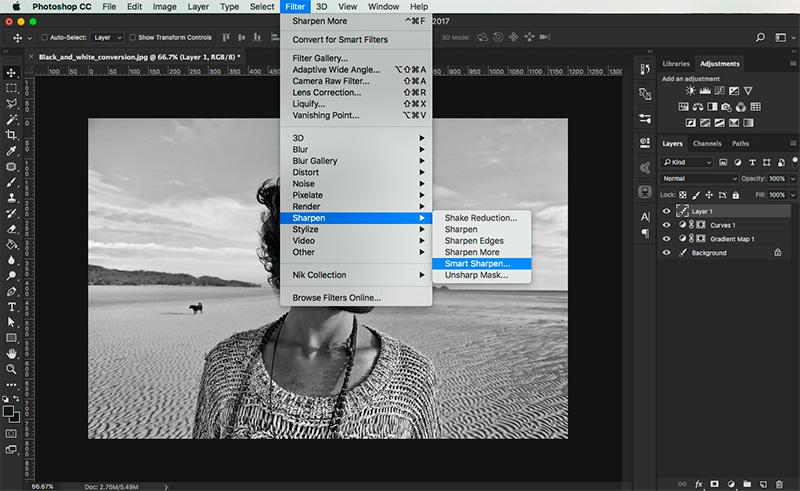
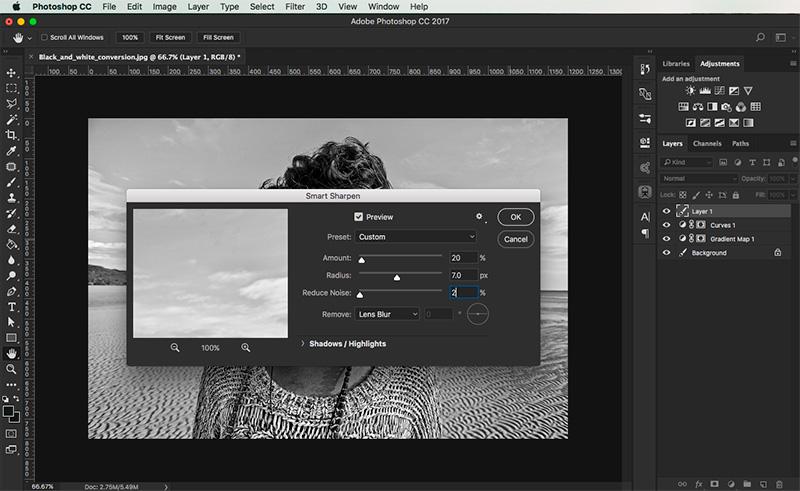
Step 4: Go to ‘Filter’, ‘Sharpen’ and ‘Smart Sharpen’.

Step 5: Adjust settings as needed.

Step 6: Go to ‘Filter’, ‘Sharpen’ and ‘Sharpen More’. This will add more defined lines to your image.

Step 7: In this new ‘Sharpen More’ layer, adjust the opacity to 20% for softer edges.

Step 8: Go to ‘Image’, ‘Adjustments’ and ‘Exposure’. Adjust the settings for exposure and gamma correction to add more contrast.

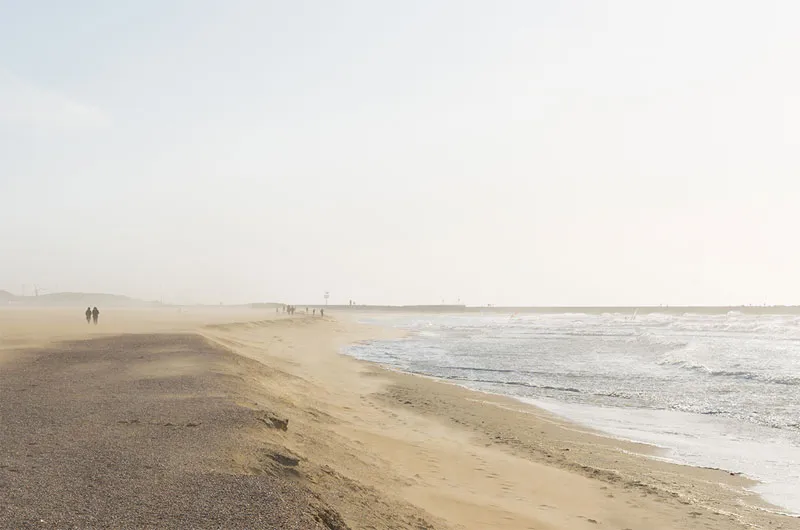
Before and after:


