Organize It: 5 Hacks to Master Your Digital Photo Archive

Digital clutter keeps too many photographers, designers and other pros from quickly finding their photos. It’s the modern-day needle in a haystack. Did we just describe your life?
If you store all of your digital assets in one bloated folder – or on five different SD cards – the good news is you’re not alone. At EverPresent, we turn digital clutter into stress-free photo archives to help you find that one-in-a-million photo in just a few seconds. Check out these five hacks from our experts to master your own digital photo archive.
One folder to rule them all. Consolidate your archive.
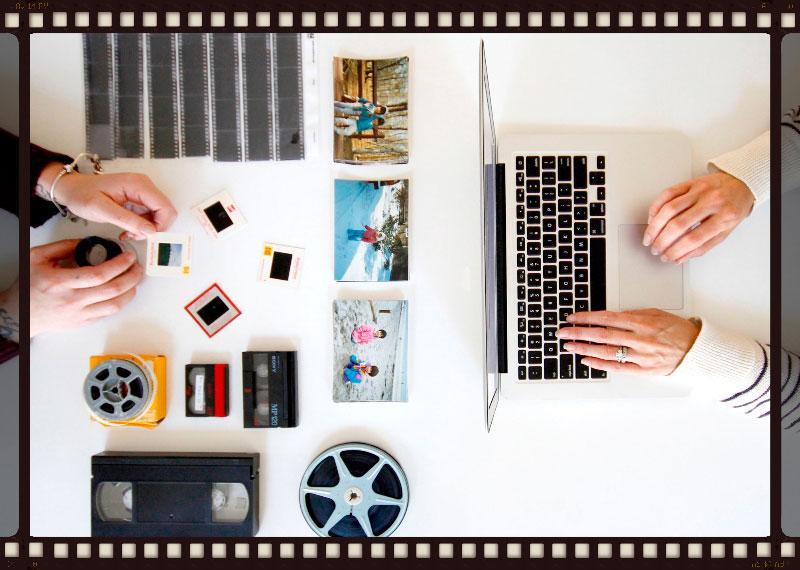
From cameras to cloud servers to Google, there’s no shortage of ways to shoot, find and save digital media. That convenience becomes a problem when your photo assets are scattered in several places. Bringing it all together in one place is the first step in getting a handle on the chaos.
If it’s been forever since you organized your digital library, it’s time to consolidate the files from all of your devices and cloud accounts into one master folder on your primary computer so you can get organized. You can use this master folder in between organizing sessions so you know what you need to stay on top of.
Consider these common places people lose their photos in and get started:
- The obvious places: Gather all your backup hard drives and flash drives. Plug in any old computers you never backed up, think really hard about any photo sharing sites you’ve utilized in the past and make sure you’ve got everything.
- Memory Cards: Most people who shoot with DSLRs store photos on SD cards. Whether you connect to your computer with a cable, a built-in slot for SD cards, or you invest in a separate card reader it’s important to empty those cards and file the raw images rather than just cycling through different ones. If you have 50 folders on your desktop from different uploads from your memory cards, put them into your master folder.
- Cellphones & their Clouds: Depending on the model you own, your phone camera might be better than some people’s digital cameras. Make sure you’re constantly backing up the originals to your preferred cloud storage, even if you leave reduced size copies on your phone, and regularly downloading your cloud accounts to your desktop to be safe.
- Your Downloads Folder and Desktop: Empty. That. Folder. Out. Move every JPEG, TIF and PNG file that exists in that black hole into your master folder. Select all those screenshots and random right-click “Save Image As” downloads into your folder. It’s time to deal with them.
Where should you keep this master folder? In addition to your desktop, we recommend storing your whole archive on a 2 TB external hard drive so you (hopefully) never run out of space. You can find one for roughly $50 online, or check out the best external hard drives here for added features and protection.
Are you copying me? De-duplicate your archive.
Getting rid of duplicate content is a must if you want to free up storage space and reduce clutter. Believe it or not, our organizers say that duplicate photos account for roughly 75% of their clients’ initial photo archives. There are so many ways for duplicate images to occur! To mention a few:
- Same photo, different file name
- Matching photos in different sizes
- Go-to graphics with three different text treatments
- Multiple photos shot in burst mode to get the best one
- Raw and edited versions of the same photo
- Redownloading the same stock photo to use again when you can’t find the first one
Sound familiar?
Proper photo deduplication involves scouring each set of like images when deciding what to keep or delete. Eyeballing each image can be tricky, especially when you start deciding whether to keep any close-but-not-exact matches that still have value.
We swear it’s worth your time. It will cut your organizing efforts in half.
- Use the search and filter options in your preferred file management program to find files with matching dates and compare them
- Look for images or downloads with the (1), (2), (5382) after the name. It means you have multiple copies of that image in who knows how many places. Do a search for those file names that contain bits of the same text and delete some.
- Break it up into smaller chunks. Do some of it at home while you watch Netflix or grab a coffee at a cafe somewhere.
- Invest in the learning curve of de-duplication software.
- DigitalVolcano Duplicate Cleaner Pro: Finds and compares duplicate photos side-by-side and gives you options to move, rename or delete them. This PC-only software is not free, but it’s an ideal program for the job. More details here
- Webminds Duplicate Photo Cleaner: Another helpful tool that looks beyond file names and sizes to find duplicates based on a set percentage of matching visual content. This option works for PC and Mac users. Check it out here.

Start growing your folder tree and get organized
You can’t keep everything in a master folder forever, even if it is de-duplicated. Not only will your “Photos to be Organized” folder become completely overwhelming, but it also defeats the purpose of the exercise and you won’t be mastering your archive anytime soon. Adding a folder structure within that archive makes it easy to keep your photos organized and find them faster.
Level 1: Start With Main Folders
Think about the most general, big-picture way to divide the work that you do and create main folders accordingly. We recommend using easy-to-understand folder names that can be as simple as “Client Work” , “Projects” or “Campaigns.” Bloggers and marketers can also make a “Stock Images” folder to save and sort the photos they’ve already spent time finding online.
Level 2: Create Main Subfolders
Yes, it’s okay to have folders inside of folders inside of … you get the idea. The trick is to gradually get more specific with each additional level of subfolders, and split up your digital assets in a way that suits your workflow.
For example, photographers who process their own photo shoots would be taking a big risk by editing their own photos without protecting the originals. If you’re a photographer, here’s how you might set up your own folders:
- Raw Files: Keep your original, full-sized files in this folder. Too much editing or compression can reduce your photos’ quality, and you may need them in the future.
- Edited Files: Copy any raw files that need editing, and store the copies in this folder. You can then crop, resize or adjust them without any risk to your raw files.
- Web Files: Before you post images online, copy them into this folder and resize or compress them into smaller files that load faster on sites and social media. Again, you’ll still have the originals.
Level 3: Use smart, consistent subfolder and file names
Beyond the main folder hierarchy, it’s up to you to label your subfolders and files in a way that you’ll recognize later. Instead of using vague folder names like Mockup, decide on a naming convention that uses dates and other details that help you find files quicker.
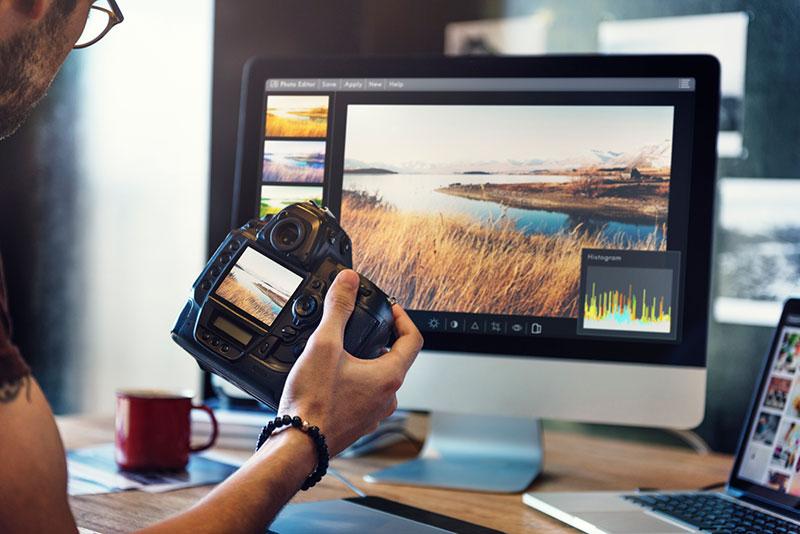
One helpful approach is to name files based on the names of the folders they’re in: 2018 Holiday Campaign_001, followed by 2018 Holiday Campaign_002, and so on. You can batch rename photos with programs like Adobe Lightroom, or consider Bulk Rename Utility for even more control over naming and managing your files.
Become BFF’s with Metadata.
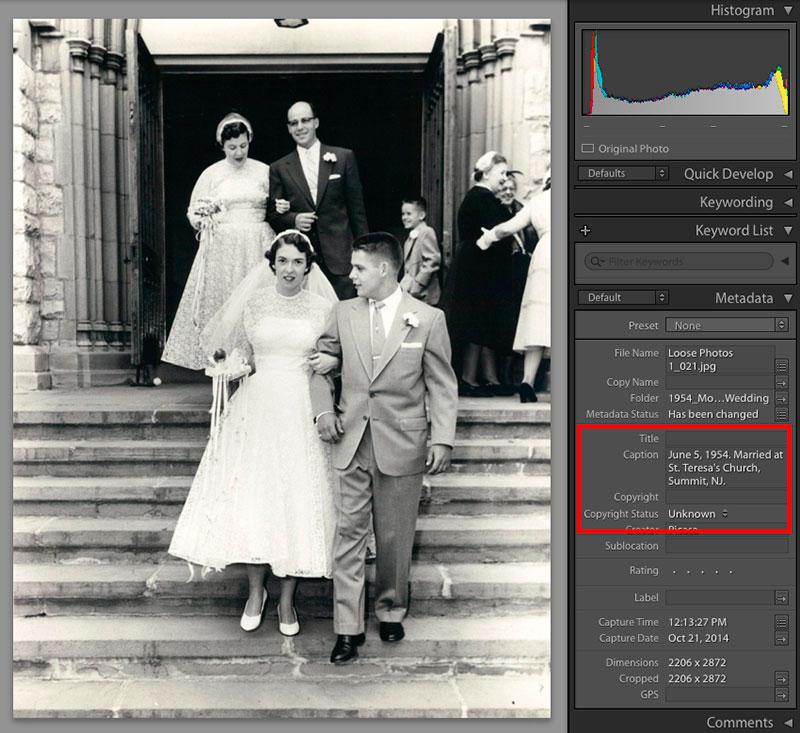
If metadata doesn’t sound exciting to you, think again! Metadata stores hidden details about your digital photos that can help you sort and find them later. It’s an under-utilized feature of digital files, and if you’re going to put the work into organizing, take the time to make it easier on your future self.
When the photo was taken: Dates are a big help when you’re combing through years of material backlog and is stored automatically.
Where the photo was taken: Travel bloggers and field photographers should love this option, but you can remove this data to protect your privacy if you work from home.
Captions that describe the photo: Captions add context. You can also use these captions for a web image’s alt text.
Keywords that relate to the photo: Food blogger? Tag your photos by course or ingredient. Tag by client. Tag by project. Tag by blog post. Tag by whatever you want! But keep it consistent. This is also perfect for managing stock photography.
Ratings for each photo: 5 stars = your best work.
Copyright information: Protect your assets! Click here to learn how.
You can use filters and search functions in photo management programs like Adobe Lightroom to find specific photos based on the metadata you add. If you’re a photographer, double-check your camera’s date and time settings to make sure your photos are saved with the right metadata.
Don’t worry if this hack sounds a bit too involved for your workflow. But if you’re not a metadata person, don’t miss our tips above for using smart file names to save data.
Keep after it!
This last hack assumes that you’ve at least followed some of the tips above, but mastering your digital photo archive is a journey. There’s no finish line as long as you’re shooting, saving or sharing new photos.
“I encourage clients to tend to their ever-growing archives in moderation. Be disciplined, but not so much that it makes you dread the process. I always recommend organizing every three to four months, and after any important events or projects. Set recurring reminders on your calendar. Delete junk photos off your phone when you’re waiting at the doctor’s office, or on your morning commute, so that when you look for a specific photo you won’t have to sift through a bunch of meaningless ones.”
-Beth Cleveland, Digital Organizing Specialist
Once you’ve consolidated your library, deleted duplicates or created a folder structure, you’ll have the basic framework in place to immediately fit any new images into your existing archive.
Not the proactive type? You might want to set a maintenance schedule instead, and repeat the process for all new photo assets every month or fiscal quarter. Just be sure to stick to the schedule before your archive spirals out of control (again.)
Reap your rewards
These hacks can work for anyone, and their benefits stretch beyond having a pretty-looking photo archive. Pros with easy access to their best photos can finish projects faster and always deliver their highest-quality work. Even families who follow these tips can spend less time searching for memories, and more time enjoying them or making new ones.
How do you master your own digital media archive? Share the wealth in the comments below!