Guest Post: A Step-by-Step Guide to Perfect HDR Photos
It’s a great time to be a photographer. Technology has come so far, leading us to full-blown cameras that fit into our pockets (and, by the way, make phone calls and surf the web too!). Billions of photos are snapped everyday, shared and enjoyed by a global audience that’s almost insatiable. Software tools – AKA the “digital darkroom” – are more powerful than ever and let us tap into our inner artist with ease of a few clicks.
Still… there are some frontiers yet to be fully conquered. Lightfield photography, 360º photos, Virtual Reality, animating still images and taking advantage of full dynamic range are all areas of great interest and advancement. Software such as Macphun’s Aurora HDR 2017 is leading the way in opening up dynamic range.
What is dynamic range? In simple terms, the human eye can look a scene and is capable to resolve details in BOTH the shadows AND the bright areas at the same time. Humans can see a relatively “wide” band of dynamic range. Cameras, even the best ones today, have a narrower band. They are not capable of capturing good detail in deep shadows AND bright light at the same time.
The good news is that tools like Aurora HDR can take multiple images shot at different exposures and merge them together into a single “high dynamic range” (HDR) image. In this article, we’ll learn how this process works, starting with two images of the same scene that I shot recently in Norway.
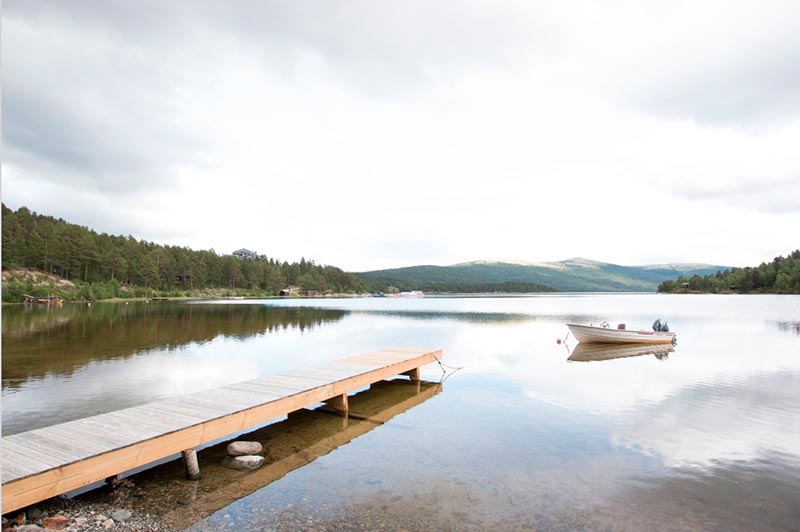
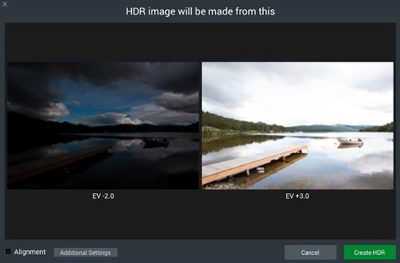
In a nutshell, you take 2 or more photos, one that is brighter (to show the detail in the shadows) and one that is darker (so you can see detail in the bright spots). In this brighter photo, you can see detail in the trees, but the sky is washed out. We’re going to want to use the darker parts of this image.
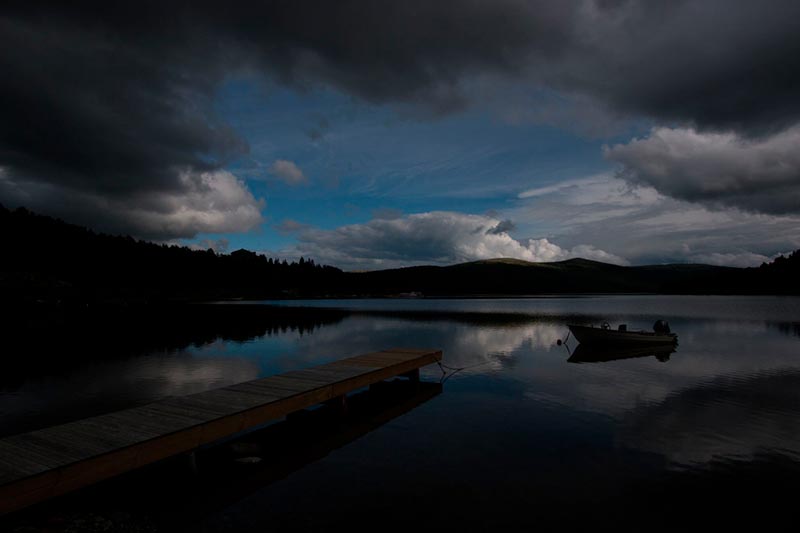
In this darker photo, you can see detail in the sky, but the trees are in complete shadow. We’re going to want to use the lighter parts of this image.
Then, using a computer program like Aurora HDR, combine the 2 photos to get the best of both worlds – the darkest parts of the bright image are perfectly merged with the lightest parts of the dark image to create a single HDR image.

In this short tutorial, I’ll walk you through a typical 5 step workflow. If you want to follow along using your own photos, simply download a trial version of Aurora HDR 2017 by clicking here.
STEP #1: Shooting Bracketed Photos
Most modern cameras will allow you to shoot photos like I have described: brighter ones and darker ones. Look for instructions in your camera’s user manual referring to shooting multiple photos at different exposure levels. This is also known as shooting “bracketed” photos. Many cameras will actually allow you to create many levels of brightness (i.e. from very dark, a little dark, a little light to very bright). Aurora HDR 2017 will allow you to use images with many steps in brightness, but for the sake of this tutorial, I will be using only 2 images.
STEP #2: Merge the images
Launch Aurora HDR 2017 and click the Load image(s) button, then select the images on your computer’s hard drive.

The images you’ve selected will be previewed prior to the merging process.
STEP 3: Start with a one-click preset
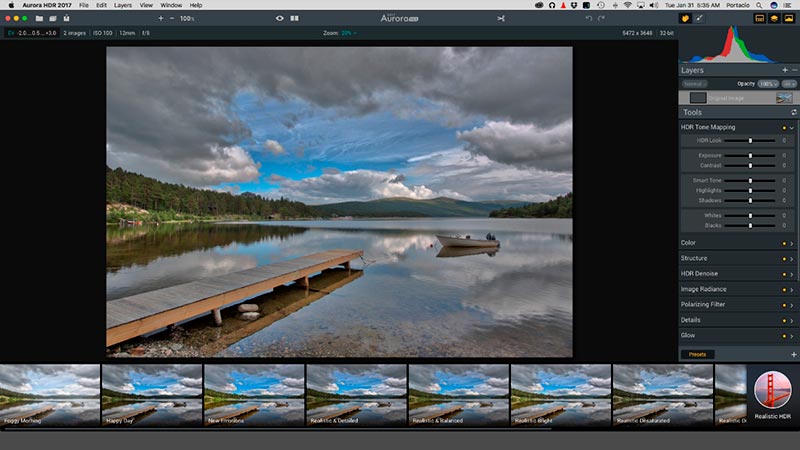
After clicking the Create HDR button in the lower right of the Merge preview window, Aurora HDR 2017 will merge the images together and open up the main editing window. On this screen you can see “Presets” at the bottom. These presets can be applied with one click and allow you to quickly explore different styles and looks for your HDR image. These styles can vary from very natural and realistic-looking HDR images to styles that are more artistically expressive and creative.
There are many presets to choose from and they can make your process, quick, easy and fun. For those want to to exercise a bit more control over the image, there are also many options. For this tutorial, I’ll start with a “Realistic” preset. Note that controls in the Tools panel on the right side of your screen change with the preset selected. This allows you to easily modify any parameter you like.
STEP 4: Begin modifying your image with editing tools
One of the first things I often change is the “Vibrance” to give the images more “pop” in color. I slide that to “53” in the example below.

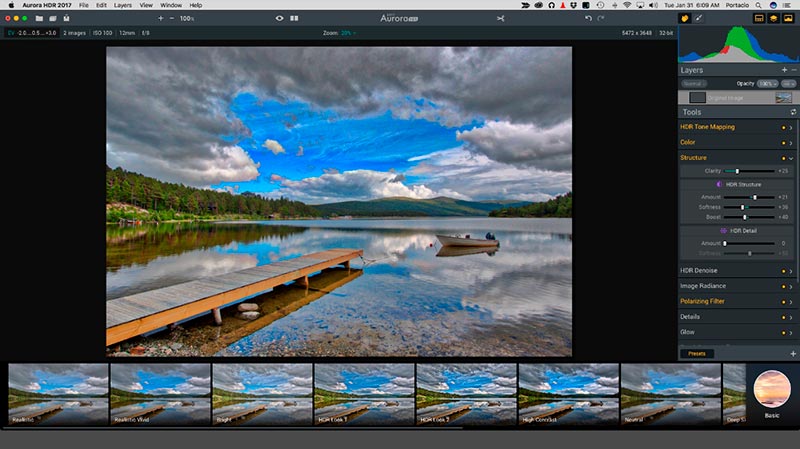
Next, I make some changes in the “Structure” and “Clarity” of the image. By changing the sliders in this area, I can bring a more dramatic look to the image as you can see below.
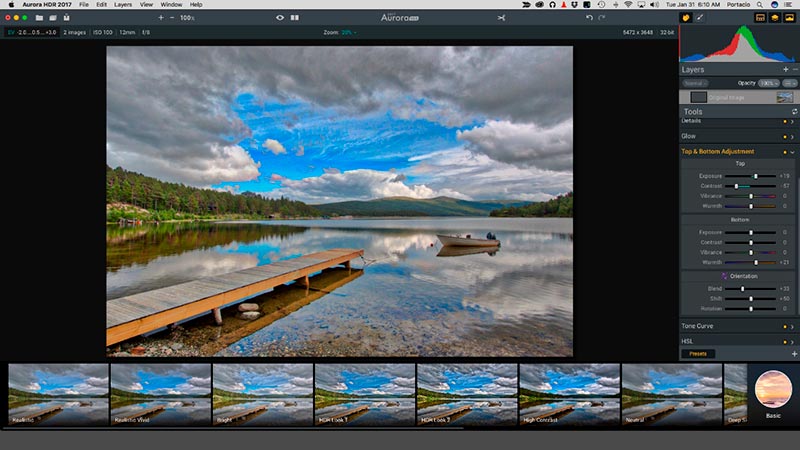
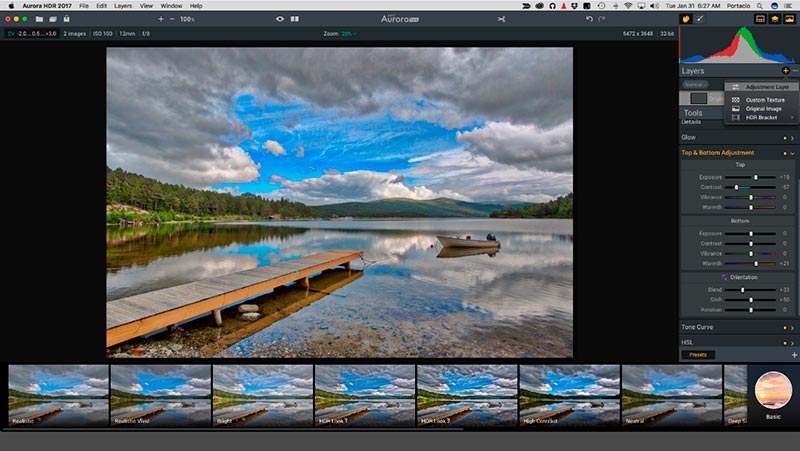
I’m also a fan of using the “Top & Bottom Adjustment” control. In the image below, I increased exposure in the top portion as well as decreasing the contrast. On the bottom portion of the image, I increased the warmth a bit (+21).
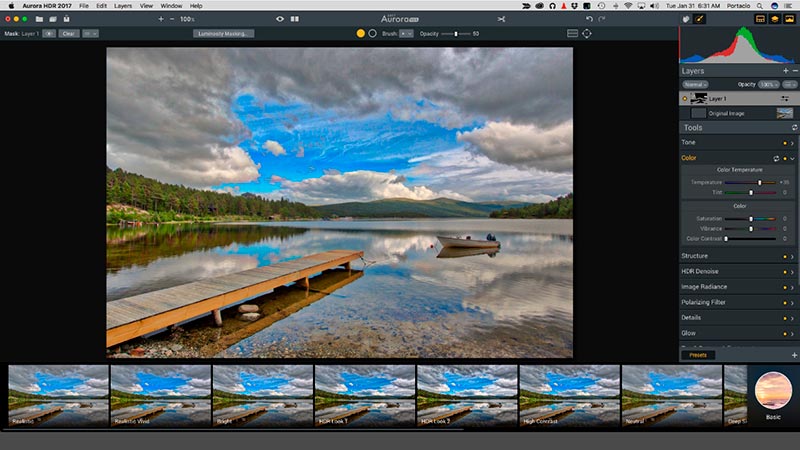
For my final act, I’d like to warm up some additional selective areas of the photo. For this, I’ll need a new Layer and then turn to brushes and masking to selectively edit the images. I add a new “Adjustment Layer” by clicking on the “+” symbol in the title bar of the Layers palette. This will allow me to modify certain aspects of the image without disturbing my previous edits.
On this adjustment layer, I choose to warm up the image (Temperature +50). Notice that, at first, the ENTIRE image is affected. We’re going to correct that in a moment.

By using the “Brush” tool, I can choose to target or paint in ONLY those areas that I want to alter. I clicked the Brush icon in the upper tool bar to select that tool and In the image below, I used it to paint increased warmth into just the clouds, the dock and parts of the reflections in the water.
When you’re satisfied, click on the Export button in the left part of the upper tool bar — it’s the one that looks like a document with an arrow pointing up. Alternatively, you can choose the File > Export to Image menu.
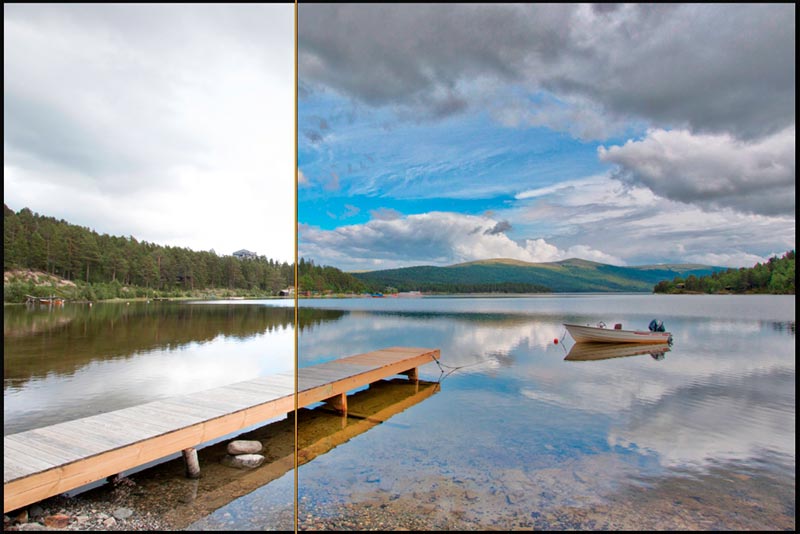
Let’s take a look at my handiwork by clicking the eyeball or split screen icons in the middle of the upper tool bar. This will show us a before / after image to admire our changes!
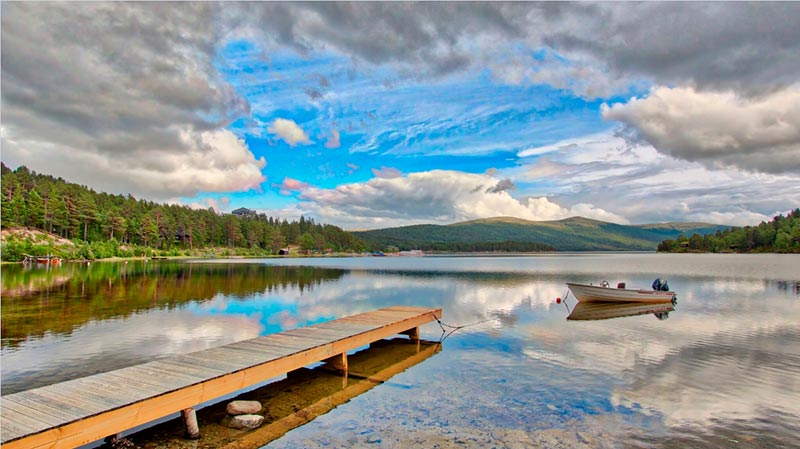
Step 5: Admire your finished image!
Below are a few more examples of what you can do with Aurora HDR 2017.
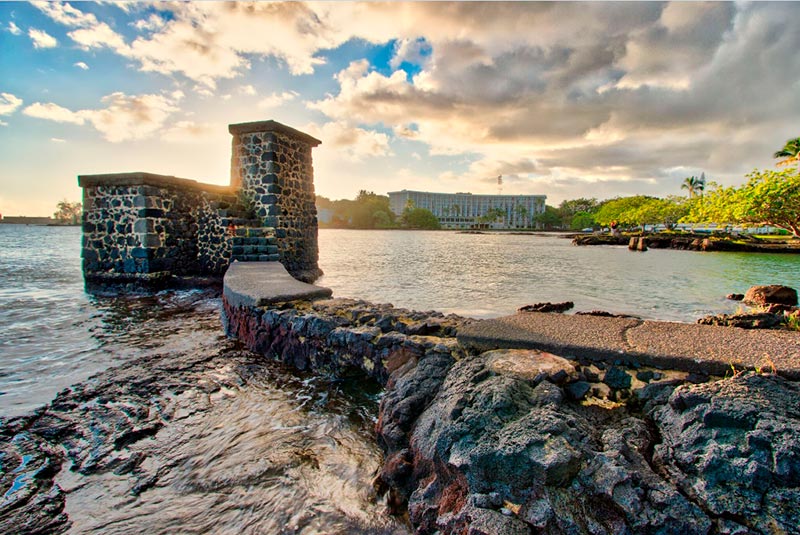
Hawaii
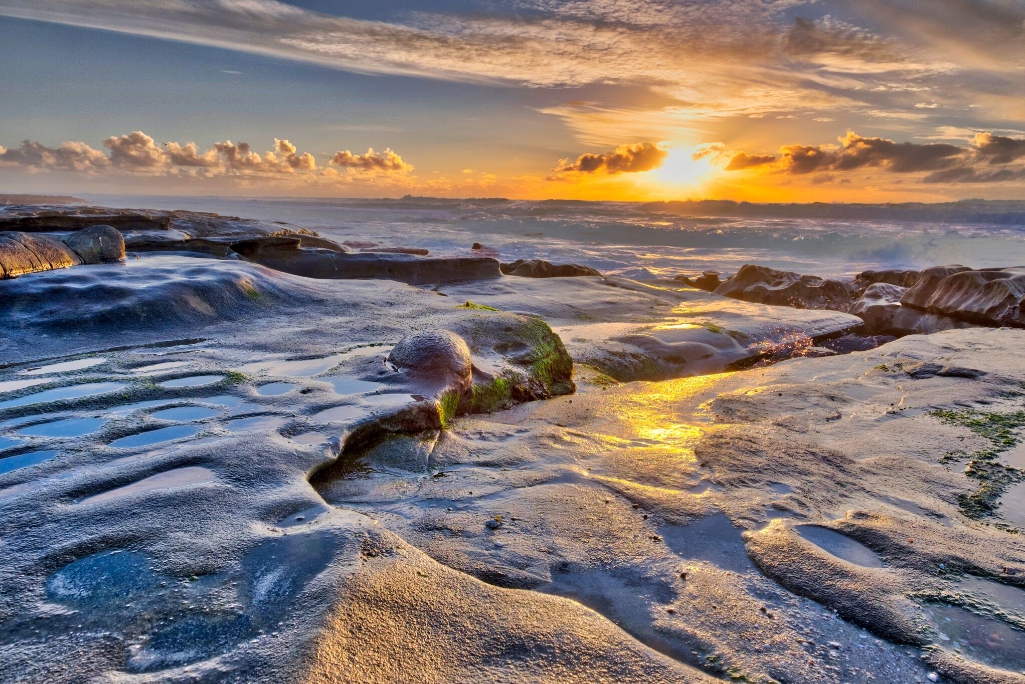
La Jolla, California
To conclude, HDR is a fantastic technique used by photographers around the world to make the impossible possible; to extend their camera’s dynamic range to more closely match what the human eye sees and create well-balanced images.Aurora HDR 2017 is the most powerful, fun and easy way to merge exposure brackets and help people achieve excellence in photography. To truly appreciate what Aurora HDR can do for your own images, there’s no better way than to simply try it! Download a free trial version of Aurora HDR at www.aurorahdr.com. Click here to view some excellent video tutorials for Aurora HDR and get started quickly. For maximum inspiration, check the images below or click here to check out some amazing HDR photos.