4 Common Composition Mistakes and How to Fix Them
Do you ever look at a shot wondering why it’s just good and not great? The smallest tweaks and angles can make all the difference. Knowing how to catch these mistakes early on will help you compose yourself during photo shoots and pay attention to the details that will make those shots stand out.
I stumbled on a great video by photographer Evan 5ps about mistakes in composition. Truth be told, every photographer makes some rookie mistakes. As composition is key to a successful shot, we need to address the problem.
Evan mentions 4 very simple mistakes. We’ll take them apart one by one so that next time you’re puzzled, you’ll know what to tweak as you’re going about your photo shoot.
1. Subject size or double subject
It’s not even the lighting you have to worry about. Lighting can often be fixed during the editing stage but the most common mistake is overwhelming the eye. Subject size matters so much because each photograph should have some sort of visual hierarchy.
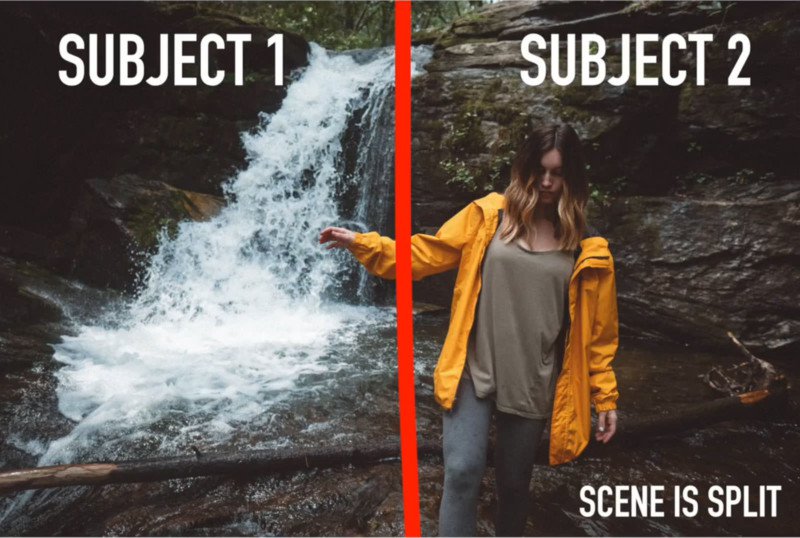
When you glance at an image and 2 subjects are the same size, like in Evan’s example of the girl and the waterfall, you don’t know what to focus on. If nothing stands out relative to the things you’ve included in your shot, chances are the photograph will just be sub par.
To fix this, keep an eye out for how big your subject is relative to other subjects in the scene. A simple change of positioning of the subject did the trick for Evan’s final shot.

2. Eyeline
Often when we talk about leading lines, you think of visible lines within a photograph that lead the eye to the main subject. Sometimes the matter of a great composition also involves eyelines. Where the person is looking directs our attention as well and leads the eye into the composition.
If your subject is looking out of the composition, it can be a little confusing. Take this example, where the shot itself is interesting but the photograph is split into two because of the eyeline.

It’s not always a must to have your subject look inwards, but in this case looking outside of the frame doesn’t do the image justice. Now, if you just adjust a few details, you can bring back the audience and invite them into the shot.
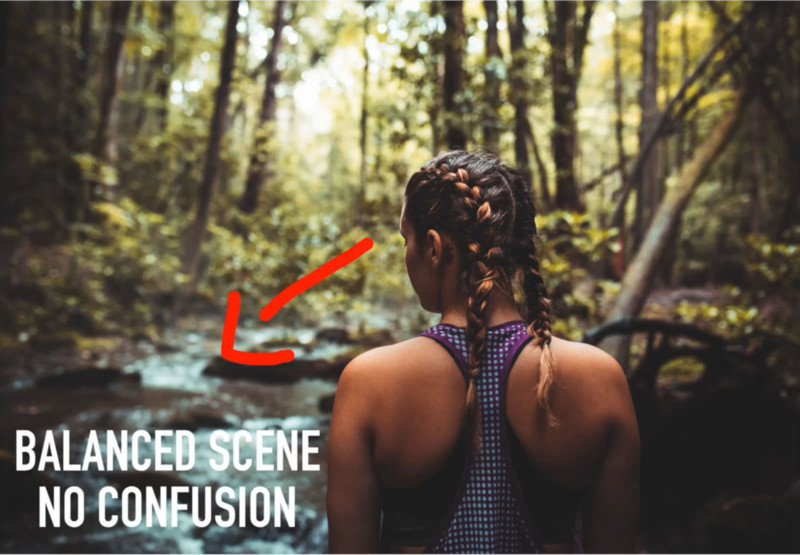
Not much of a difference in terms of focus, but this placement and glance leads the eye to create a more whole rounded composition.
3. Tangent lines
Tangent lines are imaginary lines created by the objects in the frame that all point towards something. This helps guide the viewer’s eye towards a desired spot. The best example of this is a classic composition where the lines of the road lead to the horizon line.
Tangent lines are great and there is a lot of room to experiment with but sometimes (believe it or not) compositions can suffer from lines that cut through the subject.

The trees in Evan’s shot disrupt the composition and take away from the focus. How do you fix this? Again, reconsider and readjust for something like this:
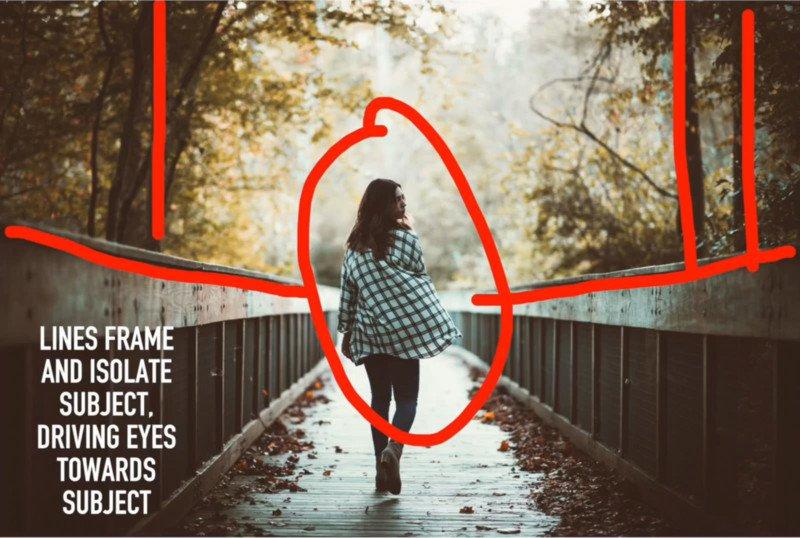
You can still see the trees in the image, but the leading lines take the eye directly to the subject and the flowy fabric playing in the wind. This composition technique is quite powerful and is definitely one to master for better shots.
4. Being lazy with perspective
This example made me realize, I too fall under this category (admit you’ve done this as well). There are times when you just want to snap that picture from your slightly drawn out hands. Snap and you’re done. Well, wrong! Here’s an example:
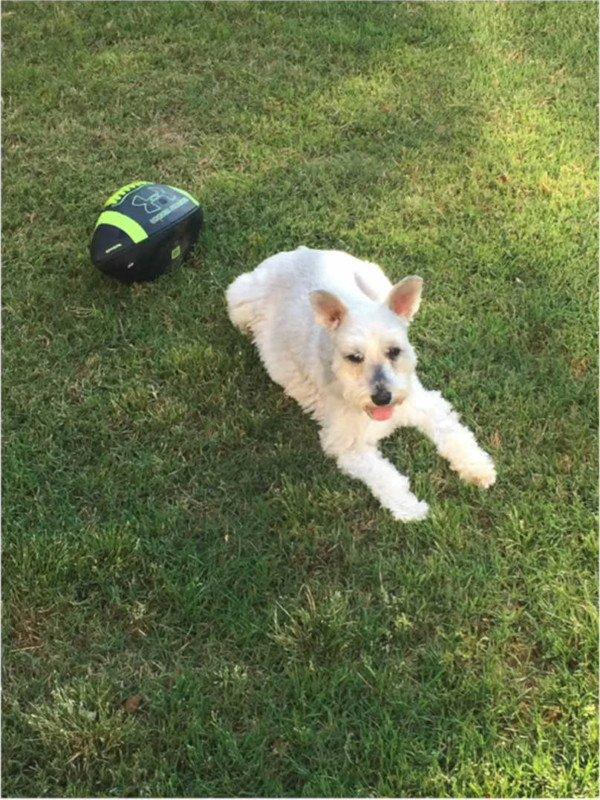
We’re looking at a picture of a dog taken from ‘the lazy angle’. This is an example of a snappy photograph, an angle where you forget about composition. Now, squatting down (which Evan points out takes 4 seconds), can dramatically change your whole image:

This is the difference between a snappy photograph and a storytelling image. To avoid this, stop taking pictures from your eye-level. Instead, think about what angle you can take to glorify your subject. This means coming closer, zooming out and actually moving and thinking about the end result.
Change your point of view, and you will change your compositions. I really loved Evan’s tutorial and wanted to share it because all 4 instances are much too familiar. If you’ve had similar mishaps, you now know what to do. Go out there and do your thing!