Based on a SKILLSHARE class iPhone Photography: Make Your Pictures Stand Out by Mariya Popandopulo
Phone camera is a great place to start learning photography, as you don’t really have much choice over controls or lenses, as compared to DSLR.
On the phone you just have to watch out for composition and the quality of light … and a few other things.
Well easier said than done, right?
So here are my top 5 tips to help you out and improve your mobile photography today =)
1) CLEAN YOUR LENS
Tip number one, a super easy one and very obvious, yet I see this kind of mistake over and over again.
Clean your lens before you take the shot
The lens on the phone camera is so small, that people forget that it is still – a lens. I mean you wouldn’t go shooting pictures on your DSLR if your camera lens was all covered with fingerprints, would you? The quality of images wouldn’t be that nice.
Same with phone camera, but even to a greater extent, as normally lens is not protected with cap or hood and is in constant touch with other things and your hands.
The left image was taken without lens being cleaned. It looks ok… but…
Now compare it to the image on the right. Here I cleaned my lens before taking a shot. See how much more contrast this picture has? There was no editing done to any of these pictures and the difference is purely because the lens was cleaned.
Here is another more extreme example. See the difference?
Normally I don’t even have a cleaning cloth to clean the lens, although I strongly encourage you to have one (because it’s the right way to do it).
When I’m out and about I use any soft fabric I have at hand – typically it will be my t-shirt =)
So, thing to remember, if you take an image and it appears to be hazy and not very sharp, first thing to do – clean your lens. In most cases it will be the reason.
Same applies to your front camera, it also needs some love and cleaning =)
2) USE LIGHT WISELY
Light is obviously extremely important. In any kind of photography. But so much more in mobile photography.
Quality of light will directly affect the quality of the picture
Images taken in poor light conditions will have more noise. Noise in the picture is when your images become grainy.
For example, here, the image on the left was taken during the day, with plenty of natural light, the image on the right was taken in a very late evening and you can see, that it has much more grain in it.
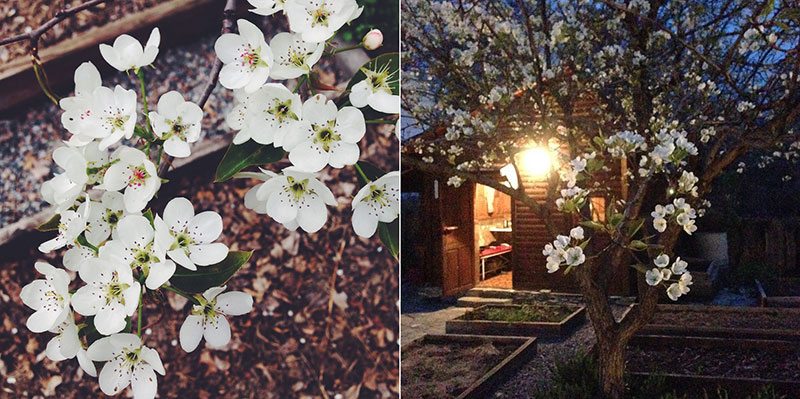
Yes, there are programs to reduce noise, but no noise reduction program will ever match the quality of the picture taken in a good light conditions.
That being said, don’t be afraid to shoot when light is not perfect, just be aware of the quality of the image. If you need to get as many details and as little noise in your image – shoot when there is enough light. Natural light is, probably, the best option in this case.
Another thing related to light quality is that – the less light camera receives the more blurry your picture would be if you:
– move or move your hand while taking a shot (picture on the left)
– your object or model will move while you taking the shot (picture on the right)
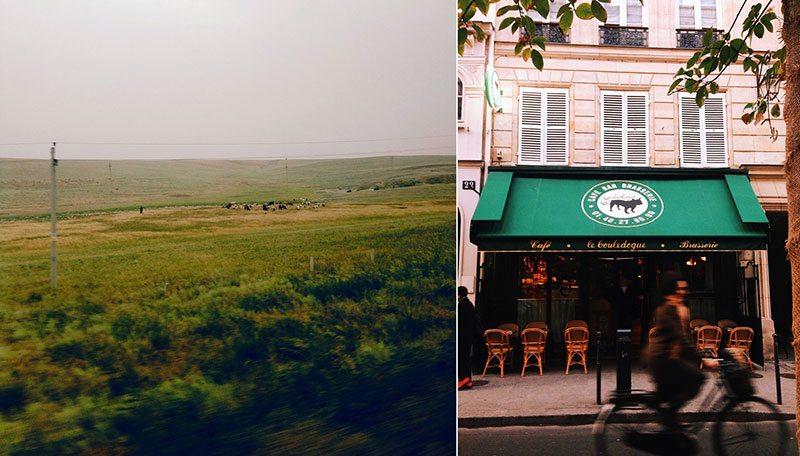
So if you need your image to be as sharp as possible you have to make sure 1) you as a photographer hold your phone steady, even using a tripod, and 2) your object or model will not move.
However, sometimes a little bit of blurriness can add an interest to the picture, making it more dynamic, like in the image on the right.
3) BE MINDFUL OF THE BACKGROUND
Background is whatever behind your photography object. It is part of your composition and particularly important when you shoot on your phone.
Phone camera takes a lot into focus
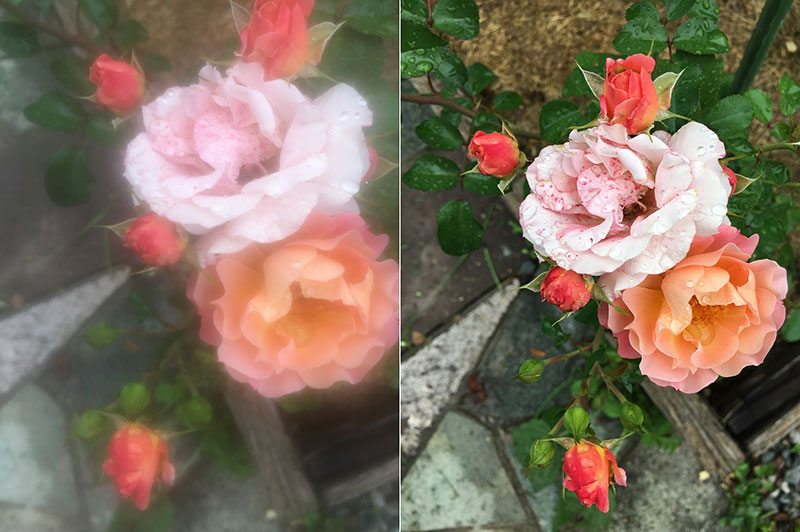
Let me show you an example. Both pictures were made with an iPhone, in both I captured magnolia flower.
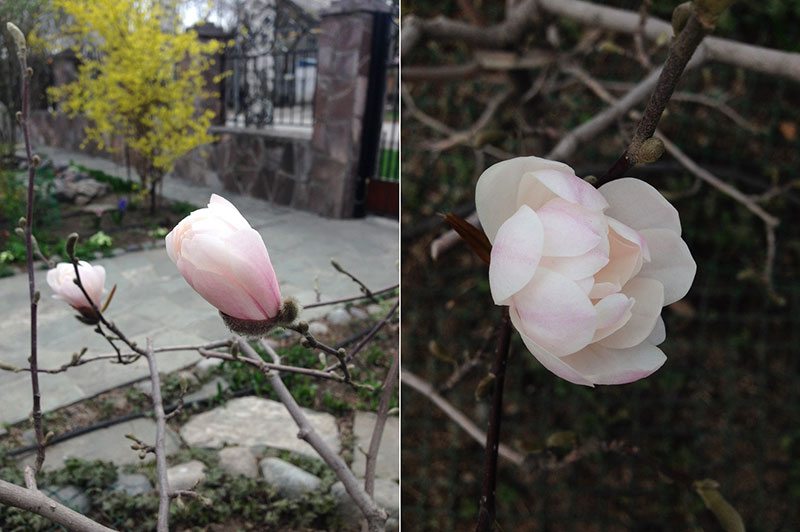
Now, as beautiful as it is, on the picture on the left our attention is distracted from the main object (flower) because the background it quite busy – with the fence, yellow bush and all other things. So it is hard to isolate and highlight your main object.
Depending on your situation always, always consider background, because it will be part of your picture. If the background distracts from your main object, try different angle or different direction, like I did on the picture on the right. I simply captured the flower from above, the dark ground provided a good contrast to the light flower, but at the same time it didn’t distract the viewer’s attention.
4) TRY DIFFERENT ANGLES
Add more variety to your photo album by making different pictures of the same subject (poppies in this case) by using more than one angle of shooting.
Try shooting the same subject from different angles
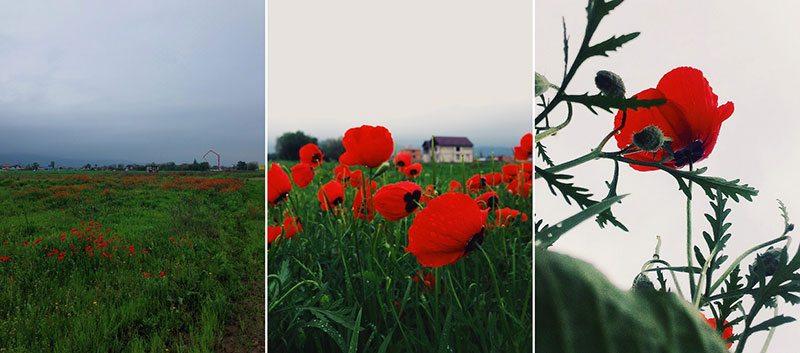
So the first image is the typical picture anyone (me included) will make when faced with a lot of pretty red poppies. I mean your first photography instinct is to capture a beautiful scene as it was, right?
Now, you can also get a little closer and try to create a bokeh effect by focusing on flowers close to the camera. You can see that on the second picture there is a house in the distance. However, because the poppies are so close to the lens and I deliberately focused on them, the house is out of focus, which creates that “real” camera effect. Also, watch out for composition – see how poppies are making a frame, drawing attention to the house?
Finally I got even closer and tried to separate a poppy from the scene. For that I shot the picture upwards – i.e. into the sky (because it was the only way really, to set a more neutral background).
5) EDIT
I firmly believe that editing to some extent not only will improve your pictures, but will also help define your style.
Try not to go overboard with editing
Over the years of shooting on my phone I tried different editing apps and currently I mostly use VSCO.
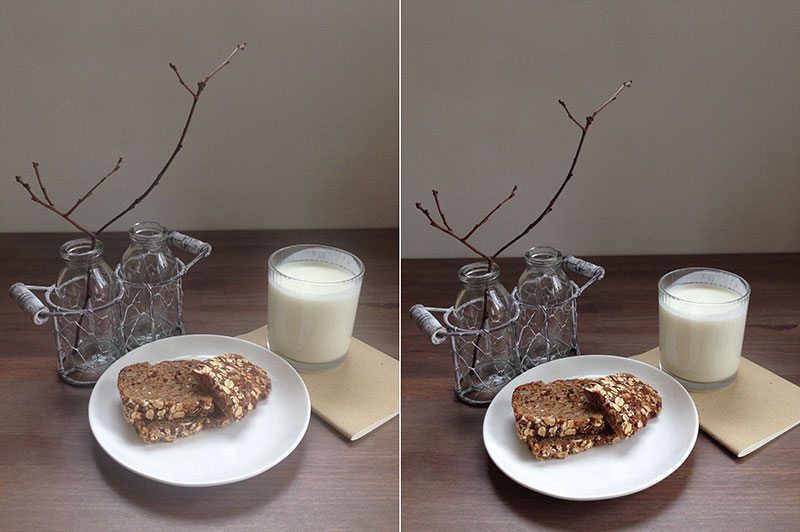
Filters are a personal choice and they affect the look of the final image quite significantly.
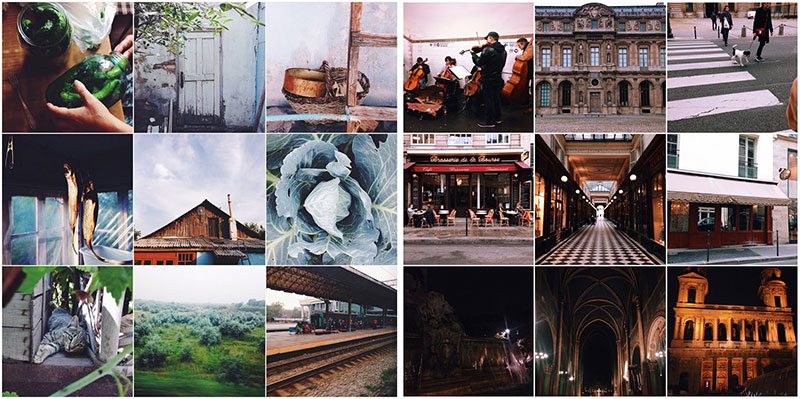
For example, the images on the left were edited with more hazy F1 filter, while images on the right were edited with more contrasty K3, which also has some red tint to it.
If you find filters too overwhelming or that they change your images too much, just don’t use them and make some personal simple edit instead. Here is what I normally do with my images.
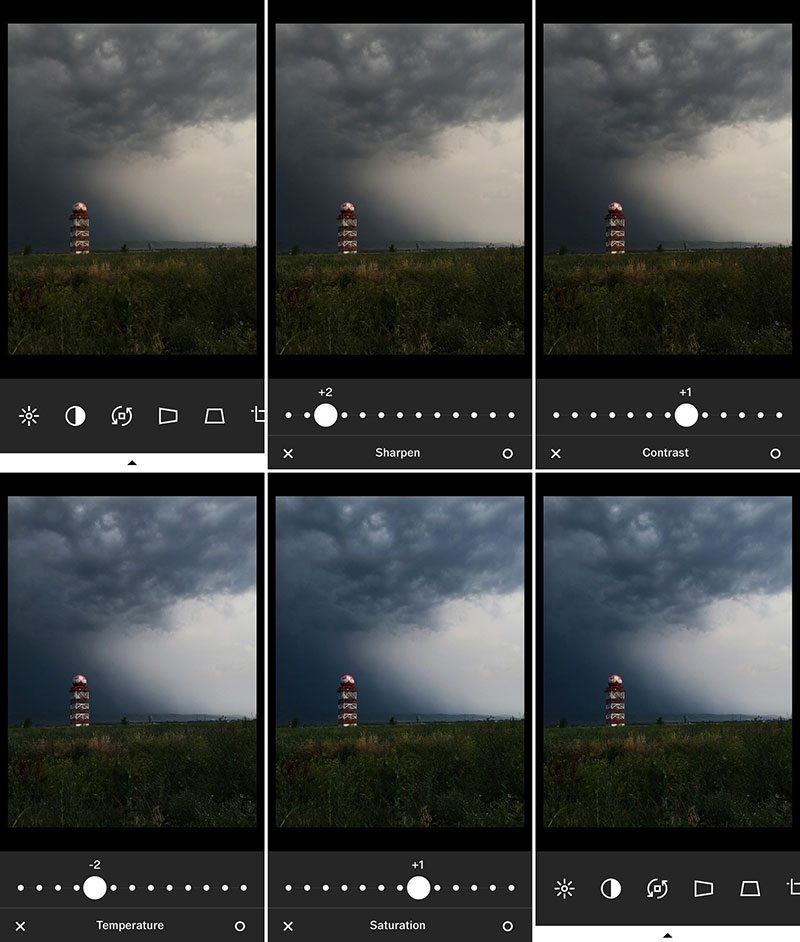
I almost always use sharpen tool, but just slightly +1/+2. Contrast adds a bit more drama to images, as well as makes colours stand out more. I don’t use temperature tool all that often, but in this particular case the image was too warm, the clouds look grey, rather than blue, so reducing the temperature helped getting more real life picture. Whenever I use saturation tool, I only dial +1/+2.
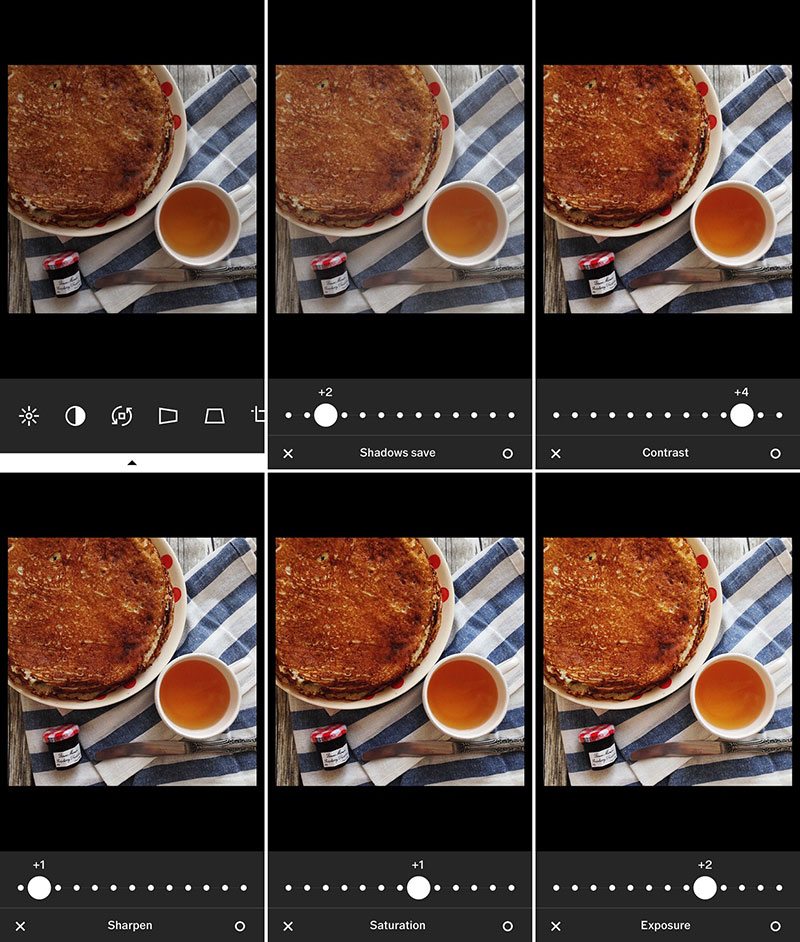
Here is another example, with a still life. As oppose to previous image, this one is suppose to be bright and cheerful, but the process is similar nonetheless.
I first increased shadows. This made picture look brighter, but at the expense of contrasts, so next thing I did – increased contrasts quite a bit. As usual I used sharpen tool and then slightly increased saturation. It wasn’t really necessary, but I like a lot of colours, so it’s a personal choice really =) Finally, I decided that image needed a bit more brightening up and so I increased exposure too.
So there you go – a few of my personal tips & tricks for shooting on a phone camera. As it goes “the best camera, is the one, that’s with you” and most of the times it is your phone camera. So don’t be afraid to use and experiment with it. Most of all have fun =)
This article is based on my SKILLSHARE class iPhone Photography: Make Your Pictures Stand Out where I talk about these and other creative ways to enhance your mobile photography, so be sure to check it out =)
Mariya Popandopulo
My photography SKILLSHARE classes
Photography blog beforeandafterblog.com
And you can always reach me out on Instagram @mariyakey if you have any questions =)

Related Articles

News and events
Spark Your Creativity! Depositphotos Launches AI Generator With Commercially Safe Images
Discover how to create exclusive, high-quality, and commercially safe images from simple prompts. Your imagination is the only limit.

Photography
How to Start a Photography Blog in 5 Steps
Follow this guide to set up a photography blog in the most convenient and expedient way possible.

Photography
Tips on Selling Mobile Photography from 7 Clashot Users
It’s hard to ignore the influence of mobile photography in the stock photography industry. We’ve recently covered topics…

Photography
Guest Blog Post: Sarcastic Guide to Modern Photography
This article is going to be a collection of some of the important lessons I’ve learnt over the years as a photographer. You will find that my advice will be more fitting to non-commercial and hobbyist photographers. I hope to share my hard learned lessons and inspire a lively discussion with the photography community.

Photography
Guest Blog Post: Beating the Composition – Advice from a Real-world Photomaker
By Adam Welch
As I think about it, the idea of what goes into making a photograph can seem slightly overwhelming. There really are quite a few things to think about when it comes to making an image (graph) using essentially only light (photo). A photograph (see what I did with the photo and graph thing?) can carry incredible artistic weight and has the power to quite literally change our world and the way that it is viewed. But what exactly makes a photograph great instead of just...well, not so great.
Photography
Our Top 10 Mobile Photographs and Why They’re Popular
Some would say that mobile photography deserves it’s own spotlight. Considering the fact that iPhoneography is its own genre of photography, it is especially true today. Our database has an abundance of amazing mobile photographs and we decided to reveal our top 10 best selling mobile images and discuss why they’re popular.
Read top articles of the month!
Don’t want to miss any tips or industry news? Subscribe to the Depositphotos blog digest.
