You can have the perfect image, with the perfect model and spot on lighting. It’s not until you zoom in that you realize – it’s another color cast. Removing a color cast is something every photographer will naturally learn during his or her career. Instead of discarding those images, give them another chance. Here’s a quick tutorial on how to easily remove a color cast from your photos in Photoshop.
Step 1: Open your image in Adobe Photoshop.

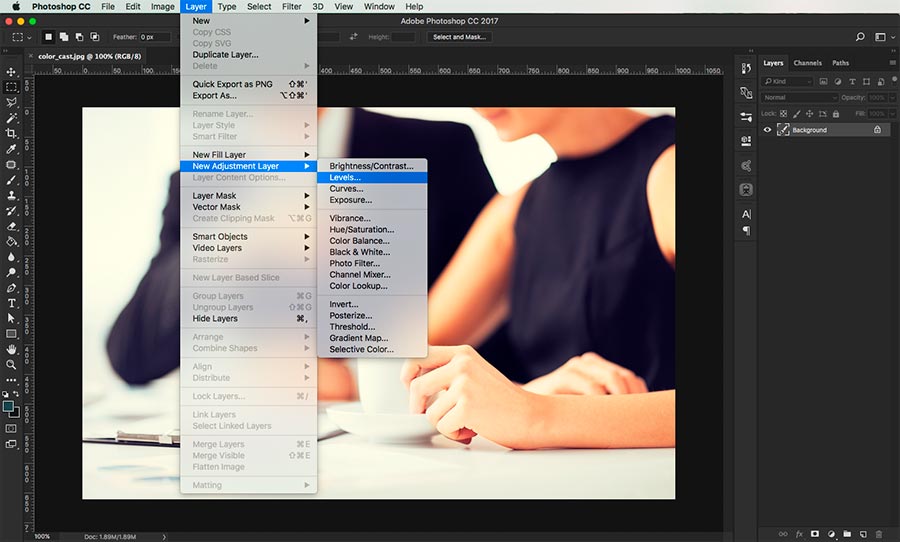
Step 2: Go to ‘Layer’, ‘New Adjustment Layer’ and ‘Levels’.
Step 3: The ‘Layers’ menu will appear.

Step 4: Go to the ‘Blue’ color preset.
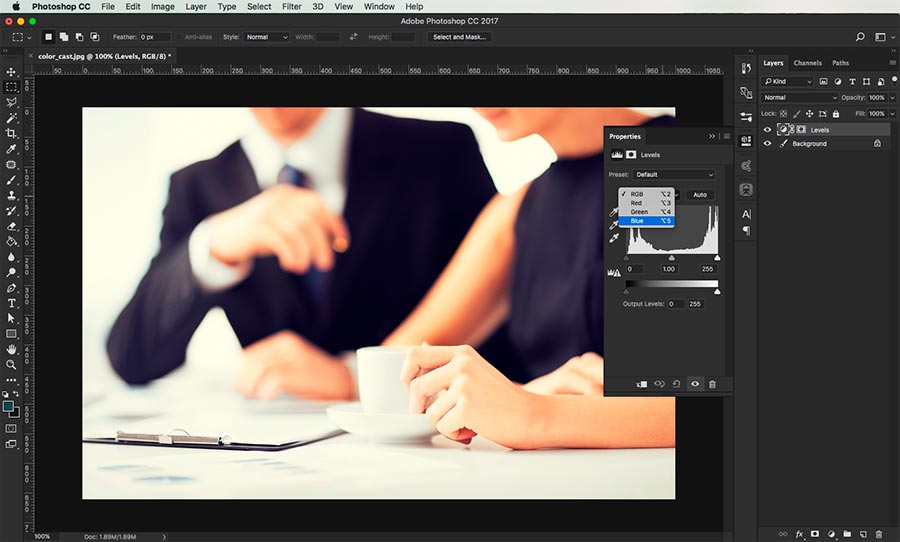
Step 5: Adjust the sliders below the graph and watch for color changes in your photo. The objective is to get the light parts of your photographs as close to white as possible.

Step 6: Select the ‘Green’ color channel.
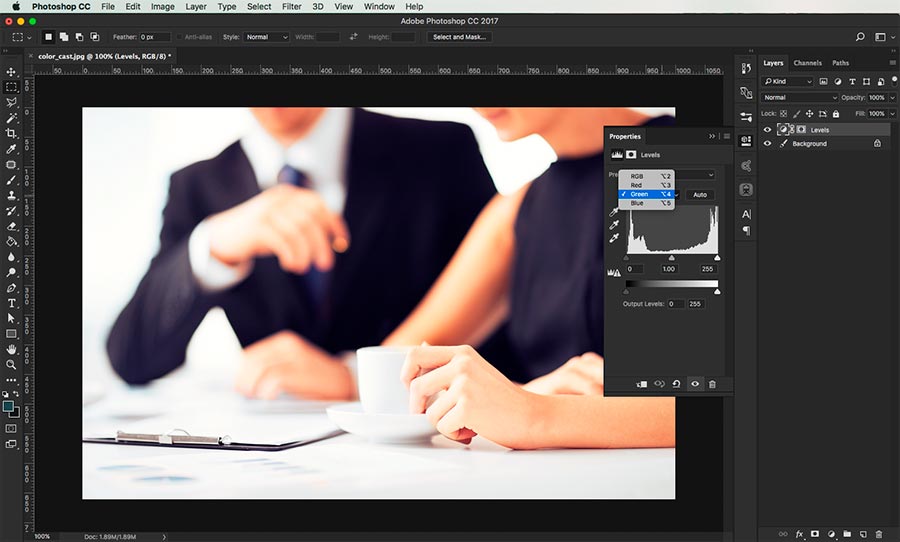
Step 7: Repeat the same procedure, slightly adjusting the slider on the right to get rid of green undertones.

Step 8: Next, go to the ‘Red’ curves channel.

Step 9: Adjust the sliders of the last color channel and watch the white spots on your image.

Step 10: You’re done!

Before and after:
Even some of your worst photos can be turned into something viable. The ‘Levels’ option in Photoshop can always help you even out any discoloration in your photographs. Understanding how to work with Levels is important and will come in handy at some point in your career.
For more tutorials, visit the photography section of our blog.

Related Articles

News and events
Spark Your Creativity! Depositphotos Launches AI Generator With Commercially Safe Images
Discover how to create exclusive, high-quality, and commercially safe images from simple prompts. Your imagination is the only limit.

News and events
Remove Image Backgrounds In One Click With the Depositphotos Free Tool
Our new tool will help you save time editing images that you can invest into more creative projects and work.

Photography
Photoshop Tutorial: How to Convert Images to Black and White
Many photographers see the charm in black and white photography and if you’re at all interested in the art, here’s a good place to start. Converting your images to black and white is easier than it seems.

Photography
Photoshop Tutorial: How to Remove Objects From Images
In our previous post, we covered one of the essential skills for photographers - how to remove a color cast. Today we’re looking at another skill that will come in handy if you have unwanted objects in your photographs. Removing objects is a lot easier than it seems. Here’s how to do it in 9 easy steps.

Other
PhotoShop World
Привет из Орландо, штат Флорида! Команда Depositphotos совсем недавно вернулась с конференции PhotoShop World, которая проходила с 16 по 19 апреля. Это было необычайно успешное мероприятие, и мы были счастливы познакомиться с такими же любителями фотографии, как и мы! С радостью поделимся с вами нашими впечатлениями. А это я с “большими шишками” мира фотографии у входа в зал мероприятия.
Other
PhotoShop World Blog
Hello from Orlando, Florida! Depositphotos has just finished exhibiting at this year’s PhotoShop World that took place between April 16-19. We are so excited to have had such a successful show and to have met such passionate and enthusiastic photo lovers like ourselves! Here I am with some “Big Shots” outside of the convention hall.

Other
Color of the Month
An easy way to escape the flat and grey nature of November is to imagine that everything around is…lilac! We proclaim November the month of bright colors and fun. Be cool, be lilac! Beauty woman in fairy scenery | Stock Photo © Depositphotos | Konrad Bąk
Read top articles of the month!
Don’t want to miss any tips or industry news? Subscribe to the Depositphotos blog digest.
