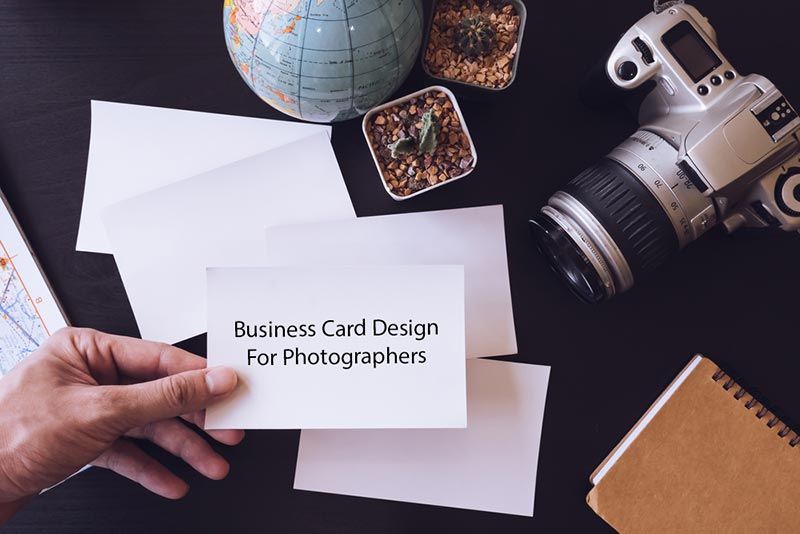
Every professional photographer needs a business card. This little piece of paper is going to be a small token for your clients that represents a part of your professional identity. Designing a business card that works becomes important because it is what will determine your memorability.
Remember that people collect business cards all the time and have stacks of them lying around. This is exactly why we have created this tutorial – to make sure you are one to be remembered.
The obvious step would be to get started with a design but hold on! Before you settle on the design, here are some things you should consider. A full Photoshop tutorial will follow these simple tips.
A few tips for designing your business card
1. What makes you different?
Use your business card design to emphasize on what makes you stand out as a photographer. What is your specialty and is there something new that you bring to the table? How will your card stand out in a deck of others? Answering these questions will help you come up with a unique concept for your design which is a great starting place.
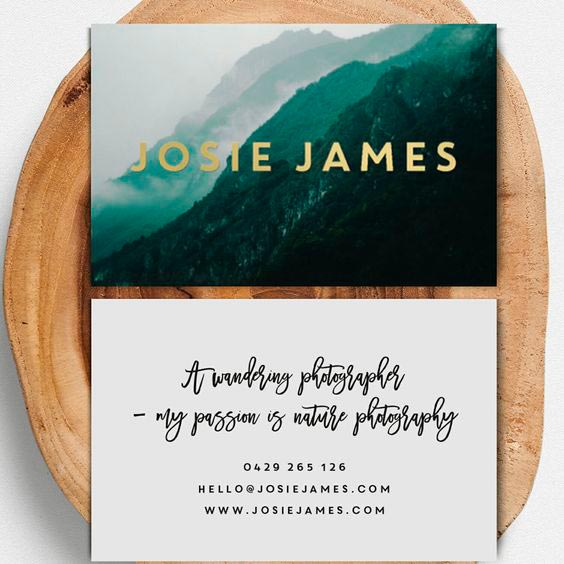
Image source: madeit.com.au
2. Establish your goals beforehand
One of the reasons photographers need business cards is to advertise their services. However, you might have other things on your agenda. Perhaps you have other lines of work that you would like to include in your card. The important thing is to have a target audience in mind. You are designing your card for them.
3. Keep brand identity in mind
If you have your own website, try to make your business card seem like an extension of it. Approach this project as if you are designing for a brand. You want your business card design to be consistent with your other promotional materials. There should be a feeling of unity with your website and your business card because in a way, you are your own brand.
4. Settle on a design
Usually artists and designers aim for creativity with their business cards to stand out from the crowd. Your business card should be consistent with your style as a photographer. Are you more experimental, sophisticated or creative? Identify your niche and pick a design style based on it. Looking at the latest business card trends will also help you narrow down your choices.
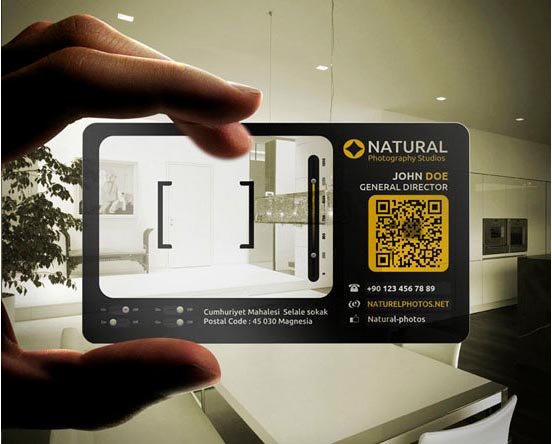
Image source: designyourway.net
5. Information to include on the card
Some people make a common mistake of including too much or too little information. The most prominent part of your card should include your name, contact information and your website where clients can find our more information about you. Your website should have detailed information about you and your work which is why it isn’t necessary to squeeze in all your social media accounts and other unnecessary details. Keep it simple and don’t overwhelm potential clients with information.
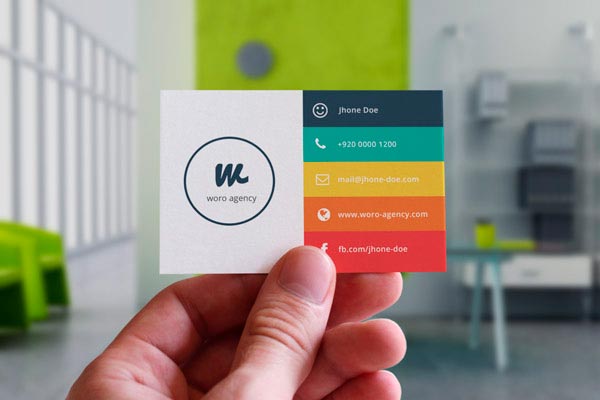
Image source: graphicriver.net
6. Give clients a glimpse of your style
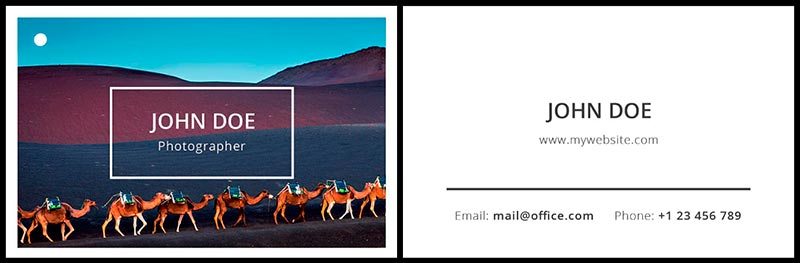
Your business card should include one or more visuals. Pick an image or images that will resonate with your clients that provides a little sneak peak into your style as a photographer. Remember that this little piece of paper is going to be what clients remember you with. Choose your visuals wisely.
Business card design for photographers – a simple tutorial
Keeping in mind that with business cards simplicity is best, we created an easy to follow tutorial so that you can grasp the basics and get creative with your business card design.
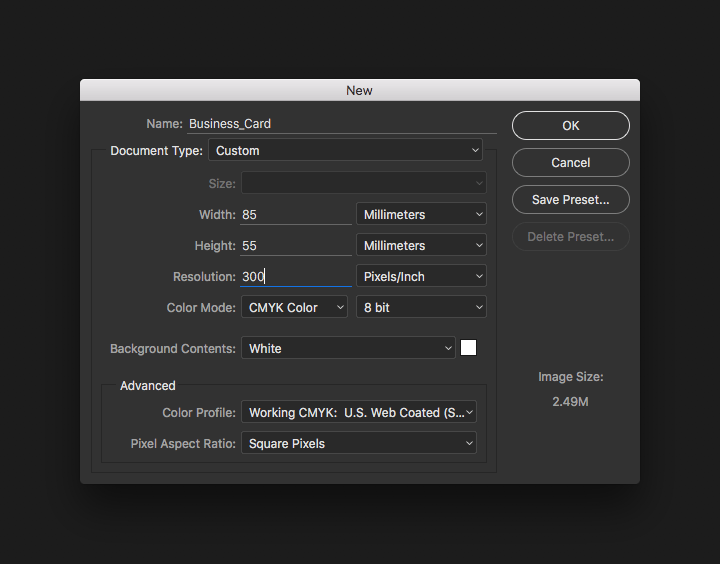
1. Open a “New” file and adjust the settings to start working on your business card. The standard business card size is 85x55mm. Set the resolution to 300 pixels/inch and choose the CMYK color mode.
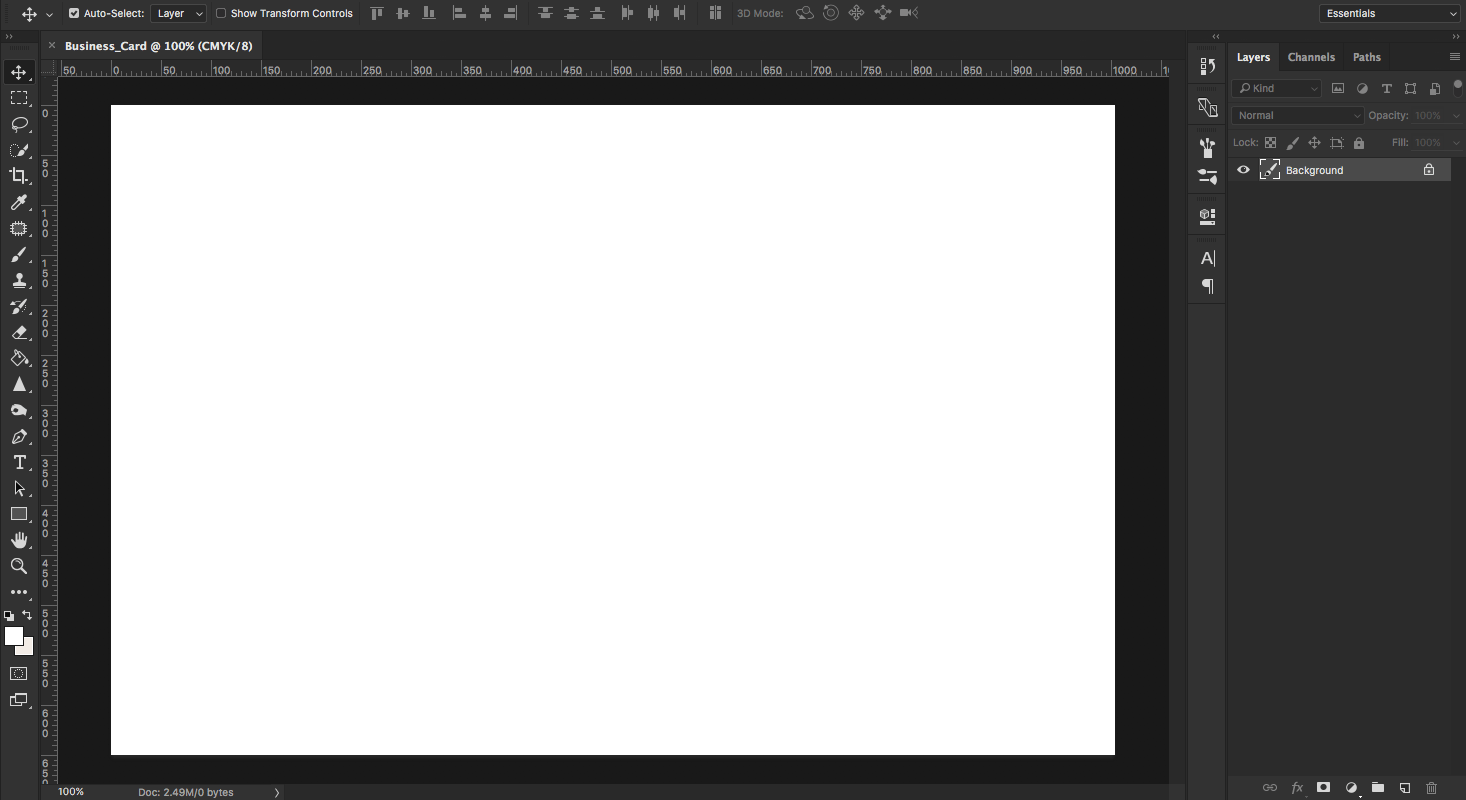
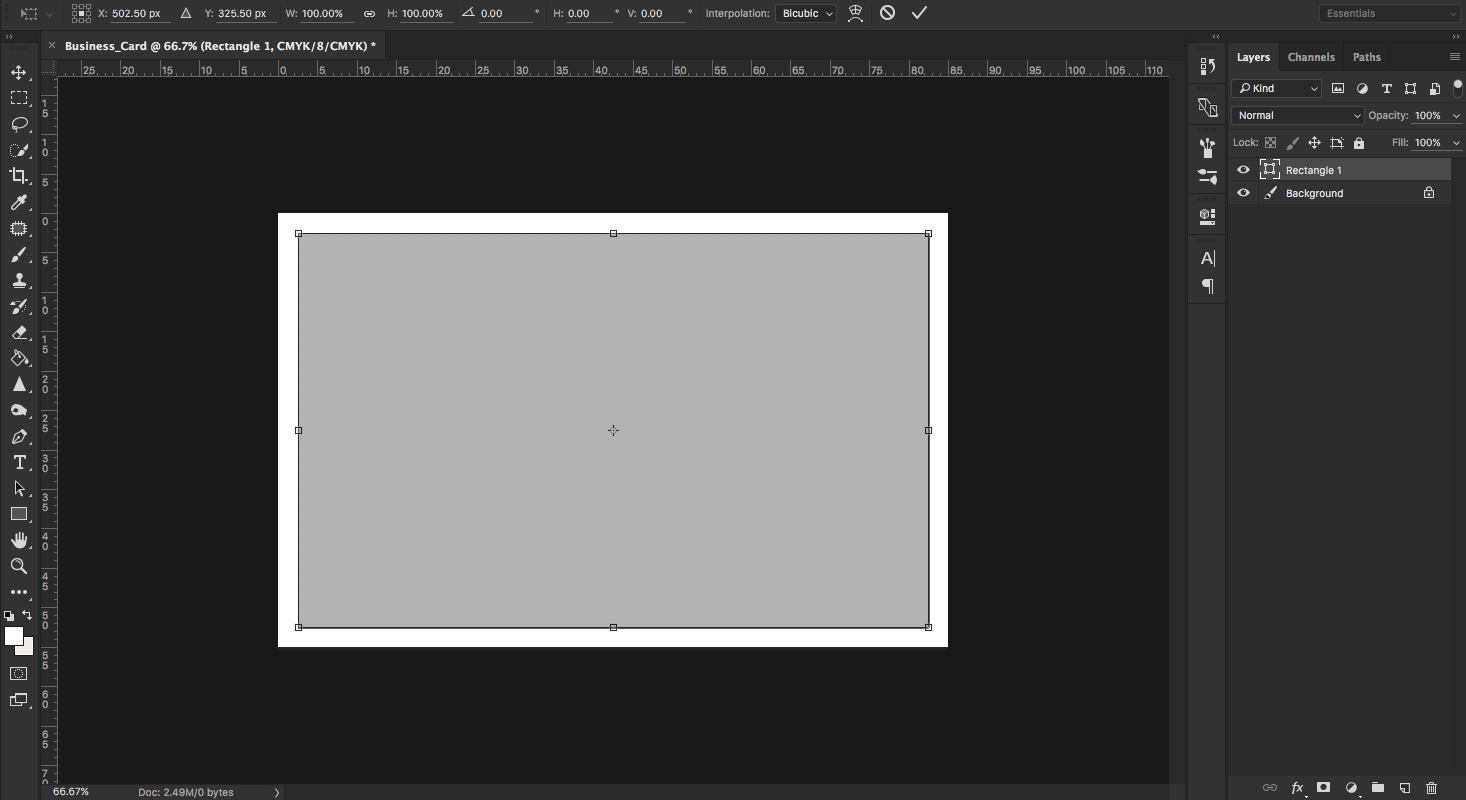
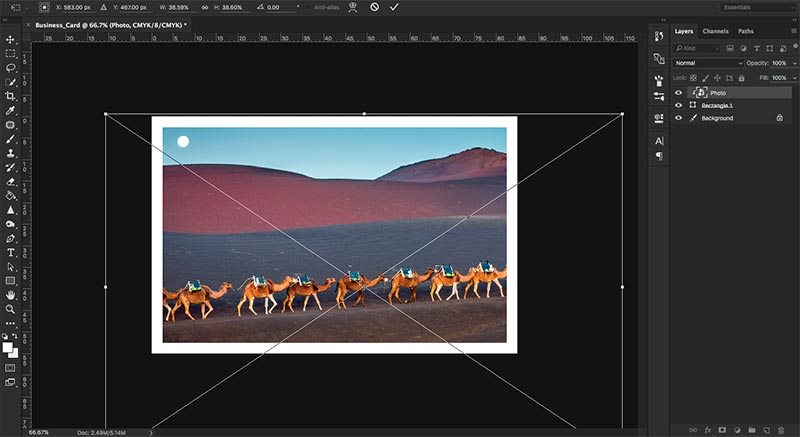
2. Your blank document should look like this. To create a border, click on the rectangle tool and create a box with the size 80x50mm.
3. Choose an image that you’d like to use on your business card and drag and drop it into the Photoshop file. The photo will appear as a new layer.
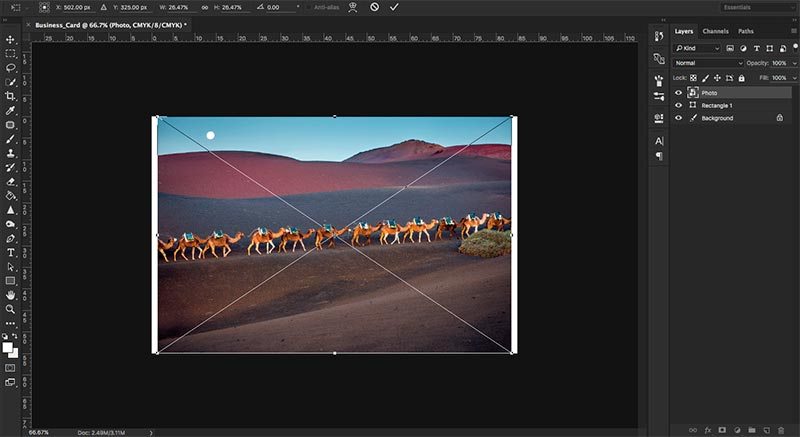
4. To make your photo fit into the rectangle you’ve just made, click on the Photo layer, hold Alt and click on the rectangle layer. The photo will adjust to fit into the frame. Adjust the photograph to fit to scale, the way you want it to look on your business card.
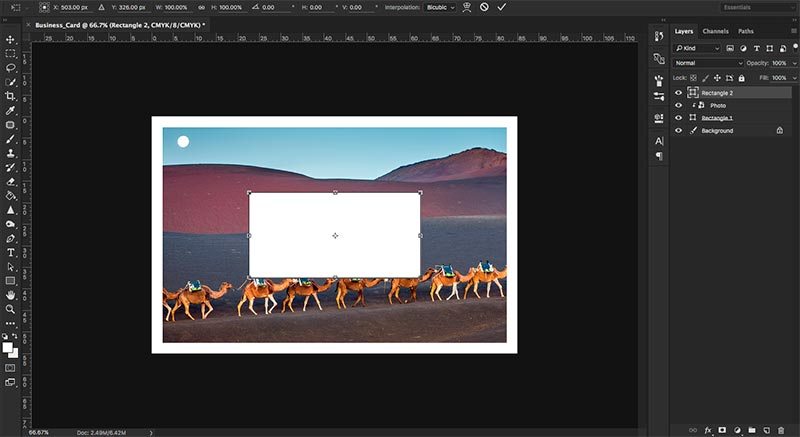
5. Create another rectangle using the rectangle tool. The size of the smaller rectangle should be about 40x19mm. Center the rectangle with the ‘Align horizontal centers’ tool.
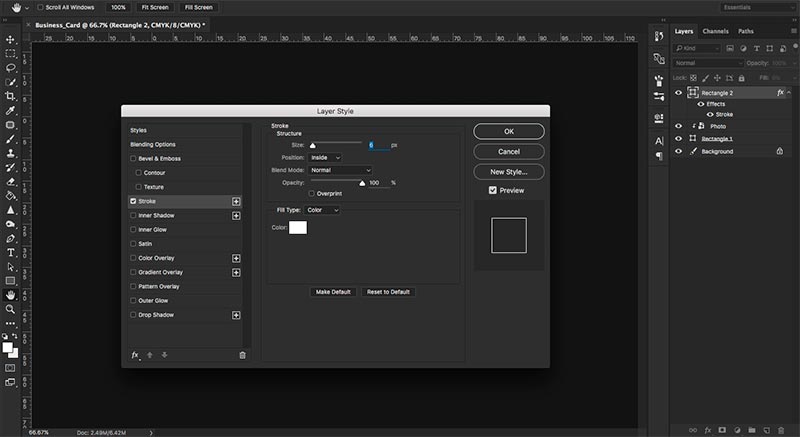
6. Click on the layer with the smaller rectangle and remove the fill. This option is on the right, above the layers. Double click on the rectangle layer and the ‘Layer style’ window will pop up. Change the stroke to 6 pixels. Changing the style will create a smaller border in the center of your business card. Click ‘Ok’.

7. The next step is adjusting your image to fit into both frames. Click on the ‘Photo’ layer and adjust the picture accordingly.

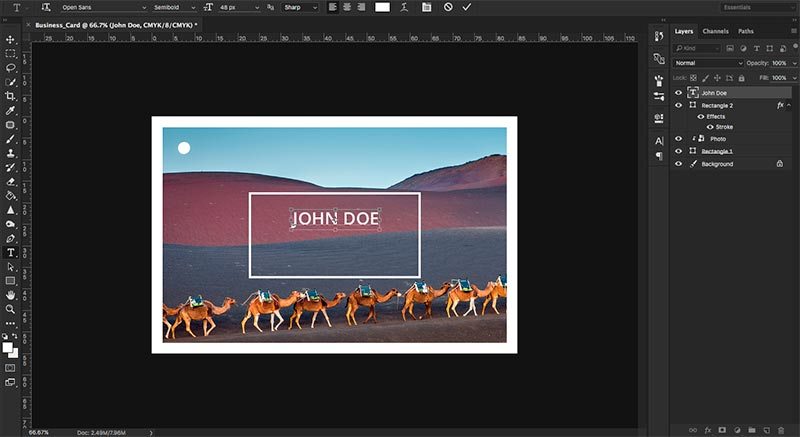
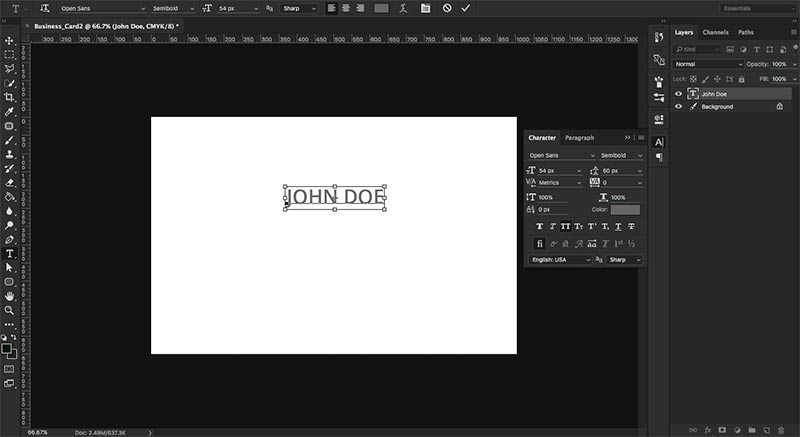
8. To add text to your business card, click on the Text tool and add all the necessary information.
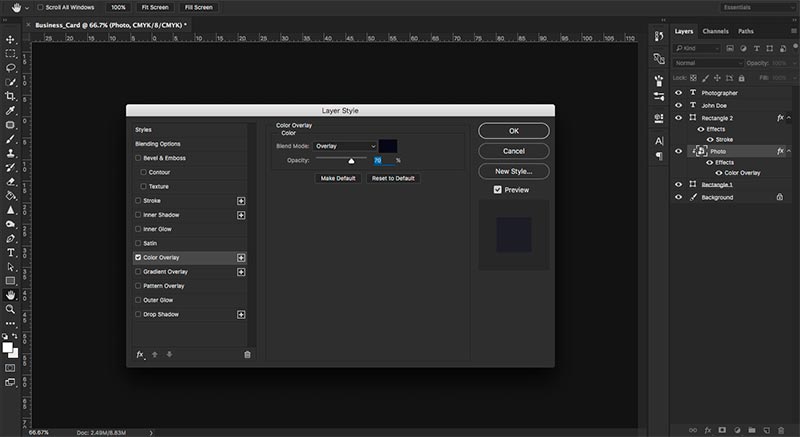
9. Double click on the ‘Photo’ layer to change the style of your image. You can add a darker filter by using the color overlay option. Adjust the settings accordingly and click ‘Ok’.

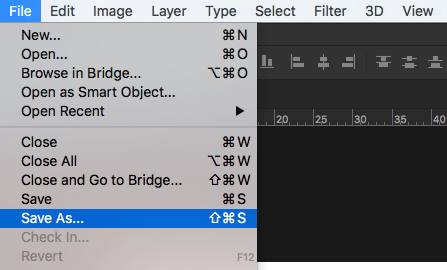
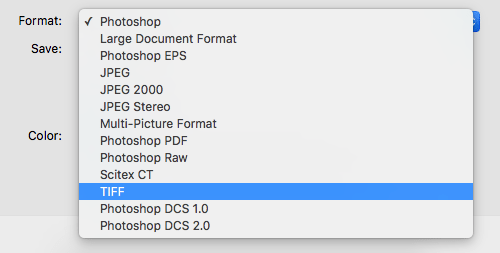
10. To save your image, click ‘File’, ‘Save As’ and save it as a TIFF file.
11. To create the backside of your card, use the same settings as in step 1. Click on the text tool and add all the necessary information.
12. Use the rectangle tool to create a divide on your business card if needed. The size of this line is 6 pixels in height.
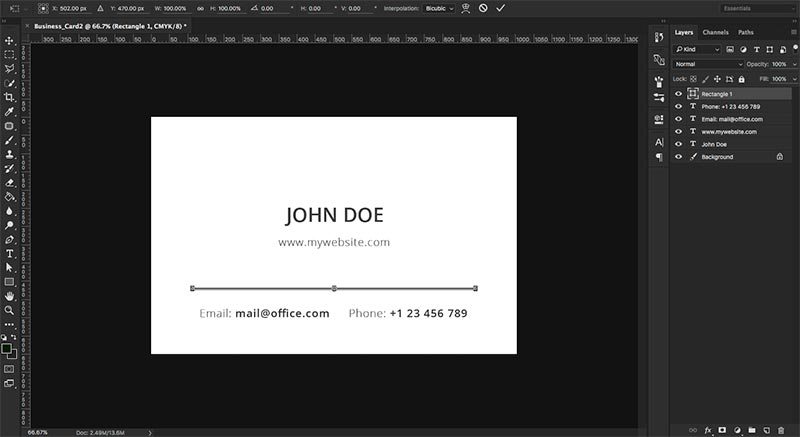
13. The front and back of your business card should look like this:

Related Articles

News and events
Spark Your Creativity! Depositphotos Launches AI Generator With Commercially Safe Images
Discover how to create exclusive, high-quality, and commercially safe images from simple prompts. Your imagination is the only limit.

Design
Graphic Design Trends 2022 [Infographic]
Catch up on the latest trends in graphic design that include kinetic typography, anti-design, risograph-inspired backgrounds, and more!
![Gradient Color Palettes for Your Next Design Project [Infographic]](https://blog.depositphotos.com/wp-content/uploads/2019/08/Gradient-Color-Palettes-for-Your-Next-Design-Project-Infographic.jpg "Gradient Color Palettes for Your Next Design Project [Infographic]")
Design
Gradient Color Palettes for Your Next Design Project
Gradient color palettes from this infographic will help communicate that your website, blog or brand is on trend this year.

Design
25 Best Mockups For Every Design Project
Suppose your design is ready to go for approval to clients. Once it seems to be ready to…

Curated collections
Featured Collection: Strictly Business
If you’re subscribed to our blog, you probably discovered in our latest bonus materials that the “Business” category…

Read top articles of the month!
Don’t want to miss any tips or industry news? Subscribe to the Depositphotos blog digest.
