There are photographers that have a ‘strictly no retouching’ policy when it comes to their work. However, every now and then we find that we can enhance our images and make them better with a slight touch of Photoshop.
Photoshop is like a photographer’s best friend. Sometimes images don’t live up to your expectations and guess what? You can alter even your most underwhelming shots to make them look spectacular. Our collection consists of 11 Photoshop editing tutorials that will help you make the most of your artistic creations.
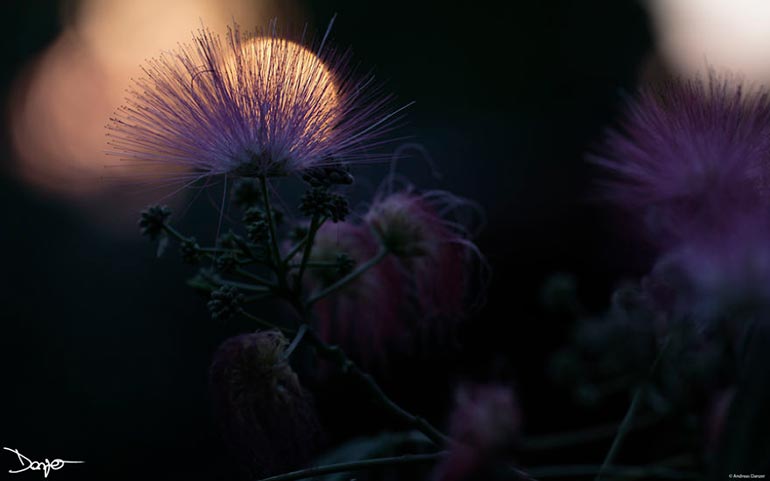
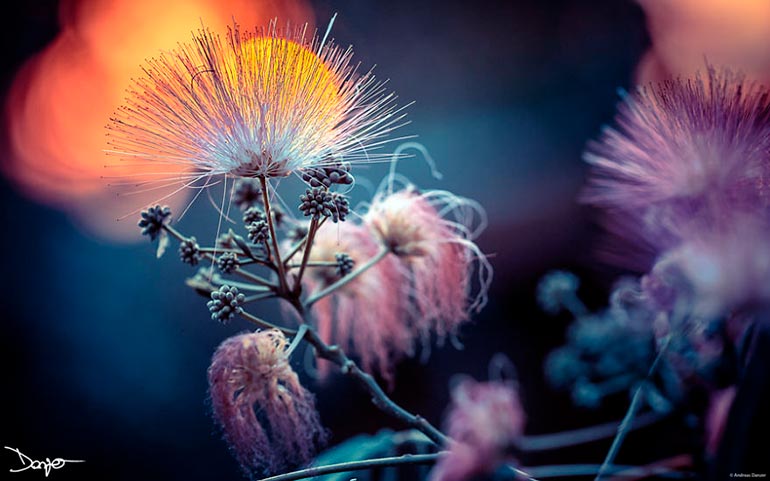
Andreas Danzer is one photographer that spends a lot of time with Photoshop. He beautifully alters his photographs to add a creative spin to his works. Andreas’s work is a great example that illustrates how playing around with your photographs can result in amazing outcomes.
1. Color correction
When you start working with an image, there are a few adjustments that are simply necessary. Here is another great resource on touching up colors in your photographs.
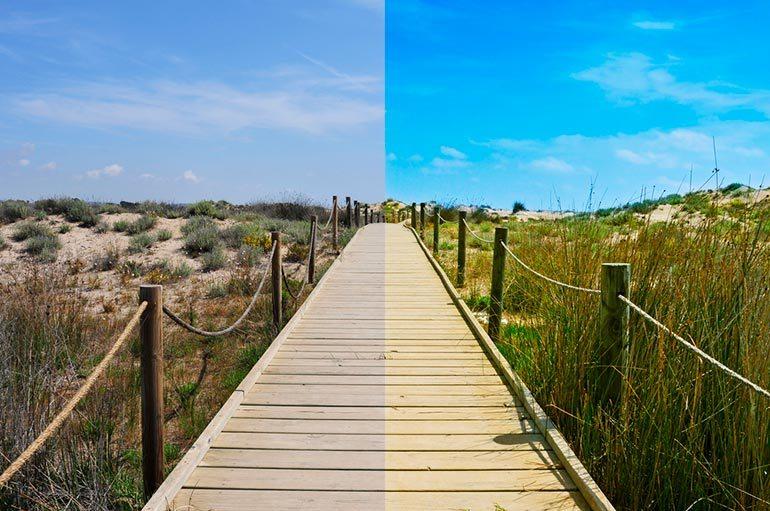
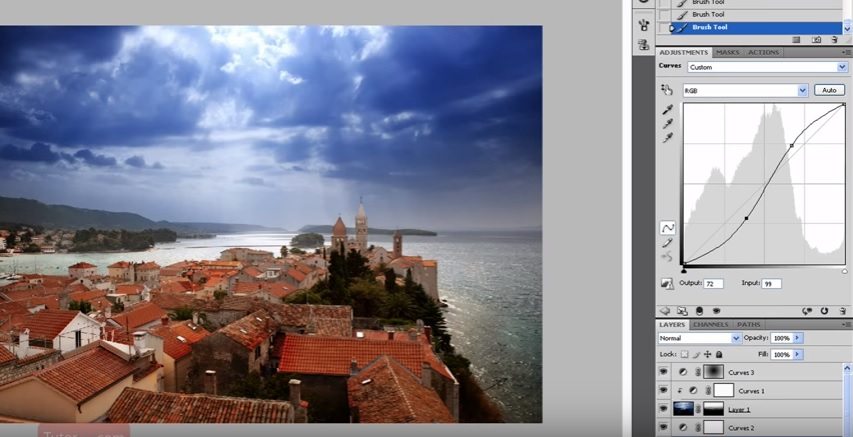
2. Creating an HDR image
Remember that it’s always best to shoot in RAW format. That way, you have more room for experimentation in the post-processing stage.
3. Cleaning up backgrounds
You can attempt at shooting against the cleanest backgrounds but even then it can be tough to get the colors and the gradient right. This tutorial helps you deal with the most complex background issues.
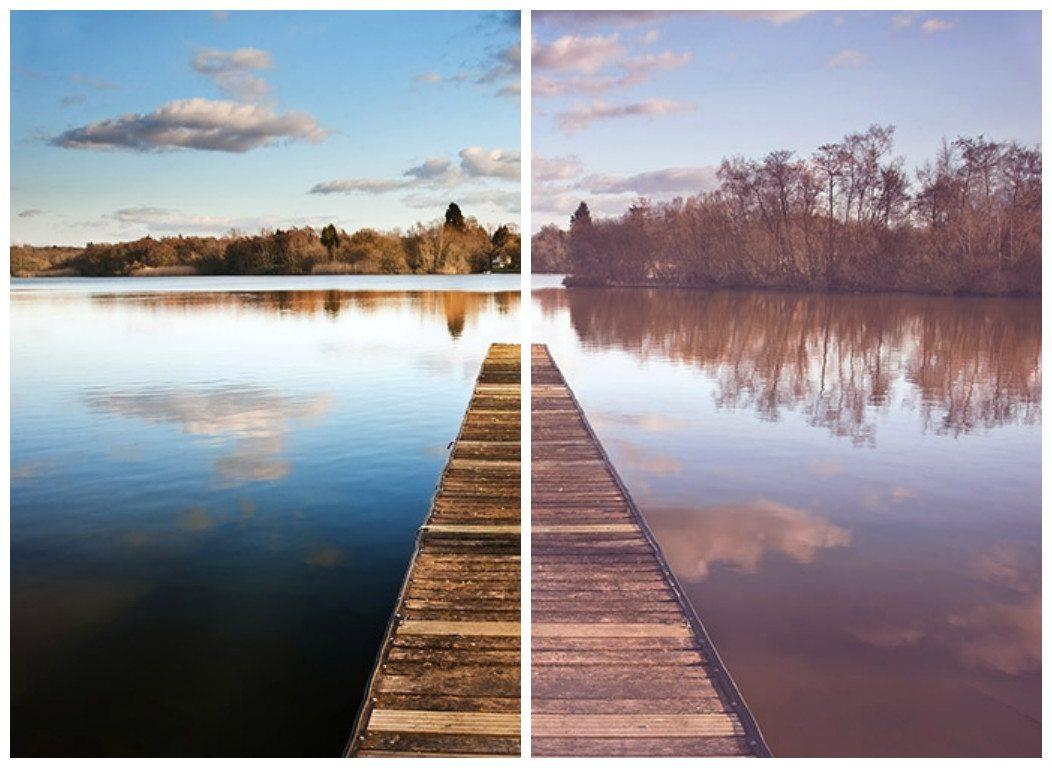
4. Haze effect
To make your pictures more dreamy, try adding a haze effect.
5. Adding light leaks
Light streaks are becoming a popular trend in photography. Experiment with your otherwise ordinary shots and add a unique filter to make your photographs stand out.

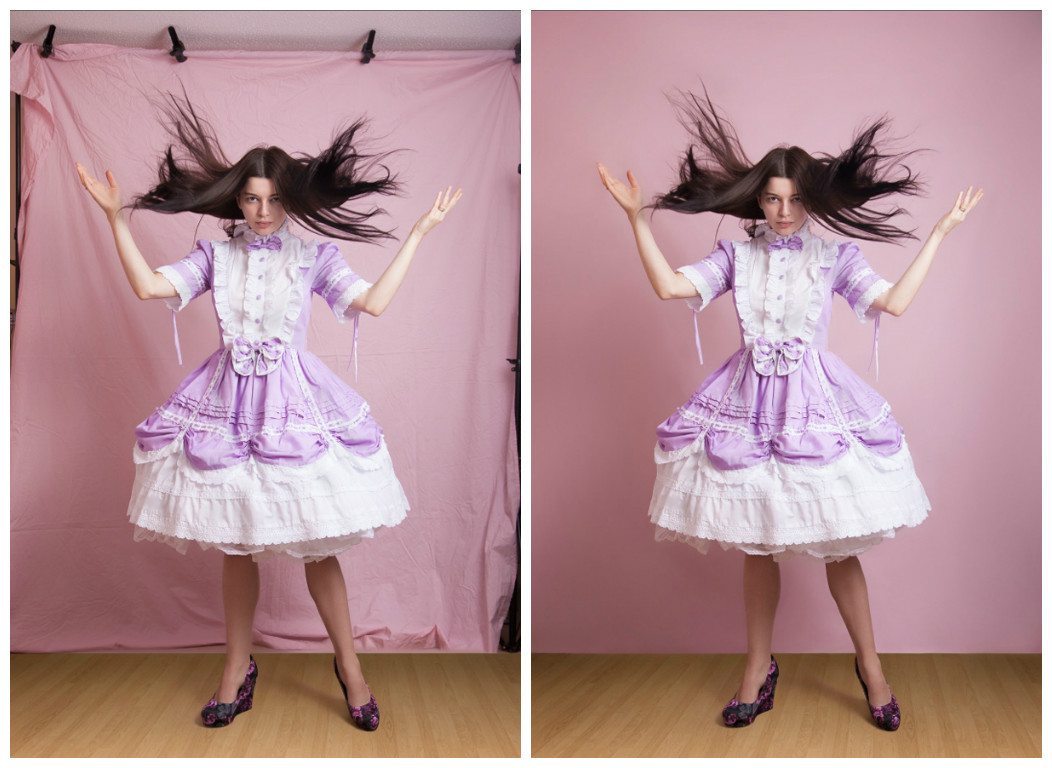
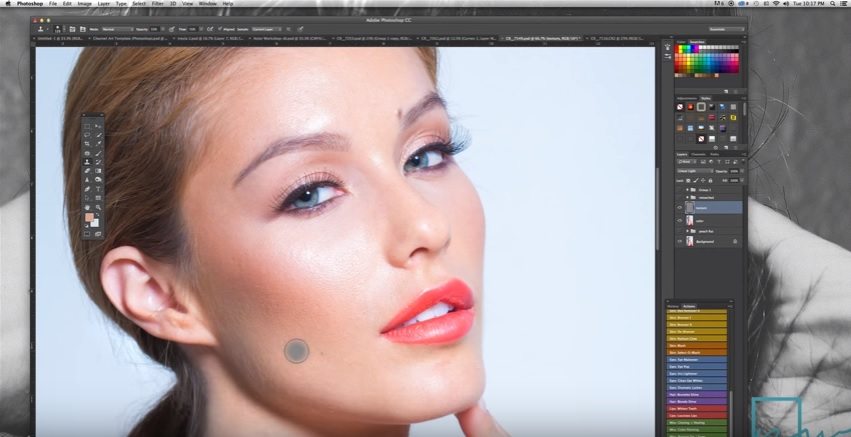
6. Skin retouching
Even under the best studio lighting environments, skin can look flushed, blemished or simply discolored. Here’s a tutorial to get rid of the little imperfections and achieve a more even skin tone.
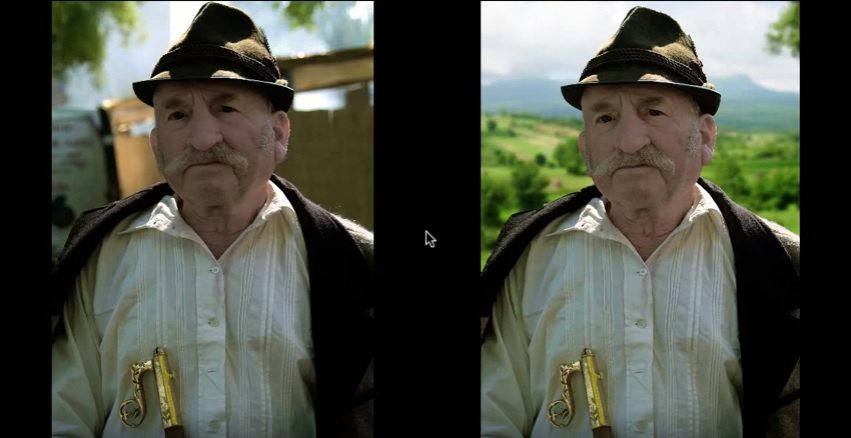
7. Changing backgrounds
You can have the perfect shot with an distracting and unfitting background. Easily remove it with this quick tutorial.
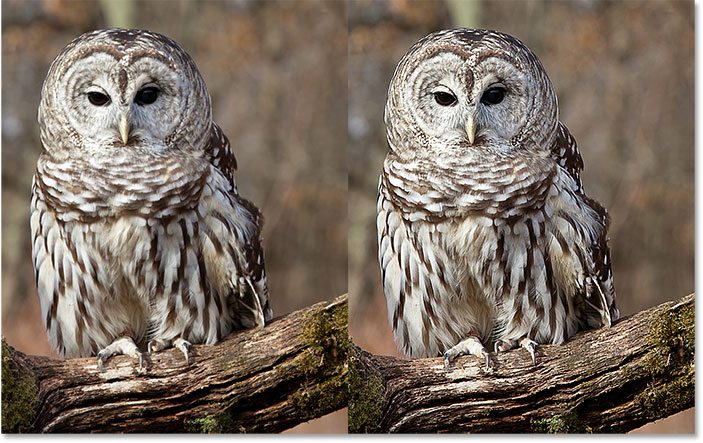
8. Sharpening images
The one effect photographers turn to most often is sharper images. Your camera can be slightly out of focus on the details but don’t stress it because it can be easily adjusted.
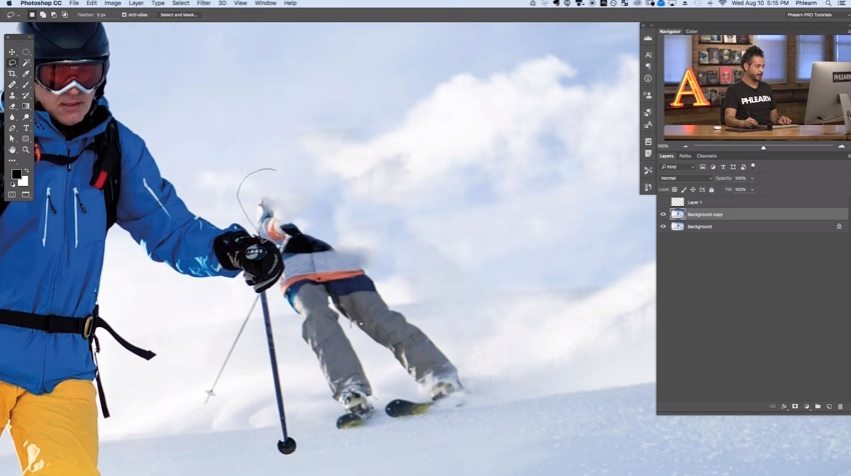
9. Removing people from backgrounds
A more complex process is removing unwanted things from backgrounds. This tutorial helps you achieve the impossible with a surprisingly simple solution.
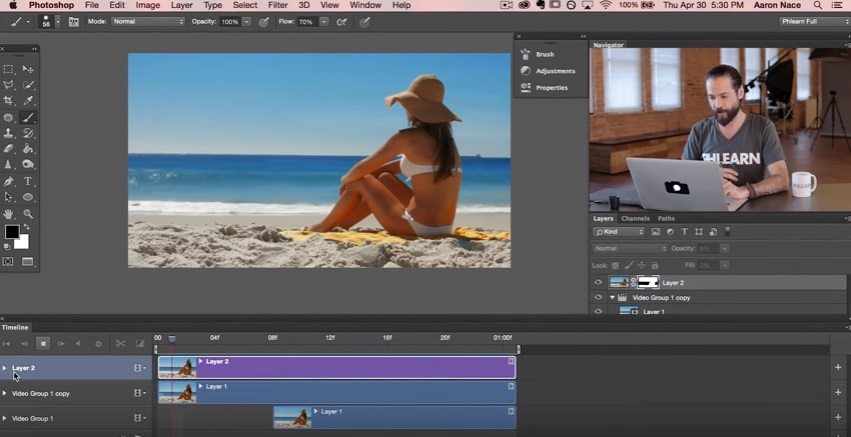
10. How to create a cinemagraph
Sometimes the missing element in the perfect shot is movement. Learn to turn your photographs into cinemagraphs.
11. Double exposure
If you want to experiment with combining your shots, try this double exposure tutorial.

Photo editing advice from Andreas Danzer
Andreas shares with us that to edit, you don’t have to submerse yourself in complex tutorials. What’s important is that you have passion and that you love what you do. If you’re determined to step it up a notch with your photographs, experiment and let your heart guide you. It is only though doing things that you will learn to master the art of editing.
If you want to start editing your photos in Lightroom or Photoshop, here are some tips form Andreas:
– Take photographs inn RAW and not JPEG
– Start playing around with the standard adjustments like temperature, tone, exposure, contrast, brightness, whites/blacks, lights/shadows, saturation/dynamic and clarity. These adjustments will already deliver quite a big change to your photos.
– Find a workflow that you feel comfortable with – in my case I start with LR for general adjustments, color grading and basic corrections, then I import them to PS for further adjustments (For instance I like working with different layers).
– Learn to use the composite modes/blend modes in PS and how to use a mask.
– You can use layers and blend modes in many different ways. You can add a lot of depth to you photos – just try it and you will have fun exploring new ways to create your own style of image.
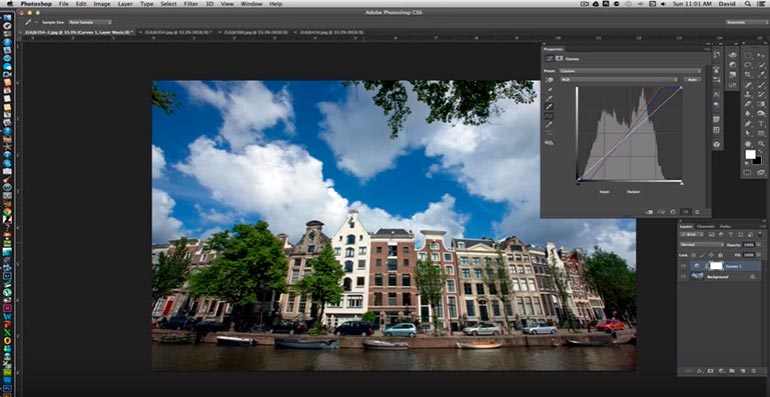
– Here’s an example: You have a photo of a beautiful landscape and you face a general problem: Either the sky is too light or the scape itself is too dark. So what you can do is the following – create a virtual copy in Lightroom. Now you have the same photo 2 times. Edit one version in a way that the sky looks as you wish and you do the same with the other version just with the difference that you focus on the scape itself. Now you import both versions to Photoshop into one project. Now you have 2 layers. Layer 1: “Scape” and layer 2: “Sky” – add a mask to layer 2 and just erase the part that is too dark (you can also use a gradient with a smooth transition for that). Now you have a bright sky AND a bright scape.
The post-processing stage of photoshoots is exciting. Try out Andrea’s advice and see the difference you can make to your photogrpahs. There is always a way to perfect your shots and make them stand out.
What are some of your favourite tutorials? Share your favourite tutorials in the comments section below.

Related Articles

News and events
Spark Your Creativity! Depositphotos Launches AI Generator With Commercially Safe Images
Discover how to create exclusive, high-quality, and commercially safe images from simple prompts. Your imagination is the only limit.

Contributors
Photo Editing Tips for Stock Photography Platforms
We share the basics that help stock photographers optimize their workflow during post-production.

Curated collections
Photo Collection: Fine Art Photography
Whether you’re writing a feature for a blog or a website, designing print materials or creating goods for retail, these visuals will make your project look artistic.

Curated collections
Photo Collection: Earth Week
Being in constant haste, we often forget to look around. But if you make it a point to…

Curated collections
Featured Collection: Drone Photography
Seeing the world from a bird’s eye view perspective is mesmerising. Sure, you can get on a plane and have a one off experience of seeing beautiful terrains from above but drone photography has gifted us with something much more.

Curated collections
Featured collection: Food photography
Food photography requires skills and an eye for beauty in simplicity. There’s a certain level of fun and a thrill when you take that perfect shot of the delicious meal before you. Photographers know this feeling way too well. We’re here to share with you some awe inspiring masterpieces of a savory, mouth watering array of dishes.

Read top articles of the month!
Don’t want to miss any tips or industry news? Subscribe to the Depositphotos blog digest.
